Joomla User Manual
Manual Index
Adding a New Menu
Introduction
For content to be accessed on your Joomla! website items need to be assigned to a Menu. A standard installation of Joomla! creates a Main Menu for you. In many cases you will use only one menu but you can have more than one. This allows you to create Menus for different types of content, hidden content, user role specific content and more.
There are three steps in the creation of a usable menu:
- Create the Menu. This is a container for Menu Items
- Create a Menu Module. This allows placement of the Menu on a page.
- Create Menu items. These are the user selectable items leading to specific pages.
This screenshot shows the menus available in a Multilingual site. In an initial Joomla installation there is a single Main Menu.
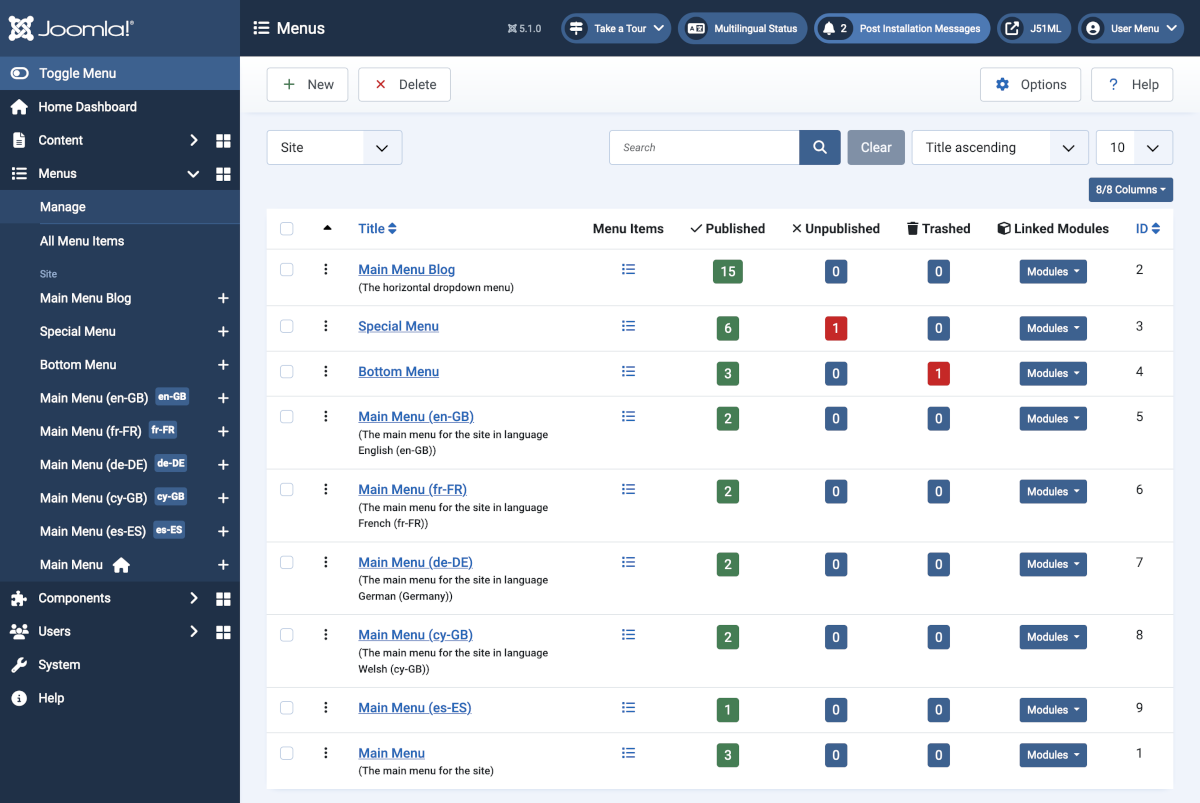
The list allows you to select any of the green or red buttons to go directly to the list of menu items in that menu and state.
This tutorial covers the steps involved in creating a Menu in a Joomla! site.
Create a New Menu
Use either of the following steps to create a new menu:
- From the Administrator menu select the Menu Dashboard Icon to be taken to the Menu dashboard, then select Manage. Or...
- From the Administrator Menu expand the Menus section and then select Manage.
- Select the + New button in the Toolbar.
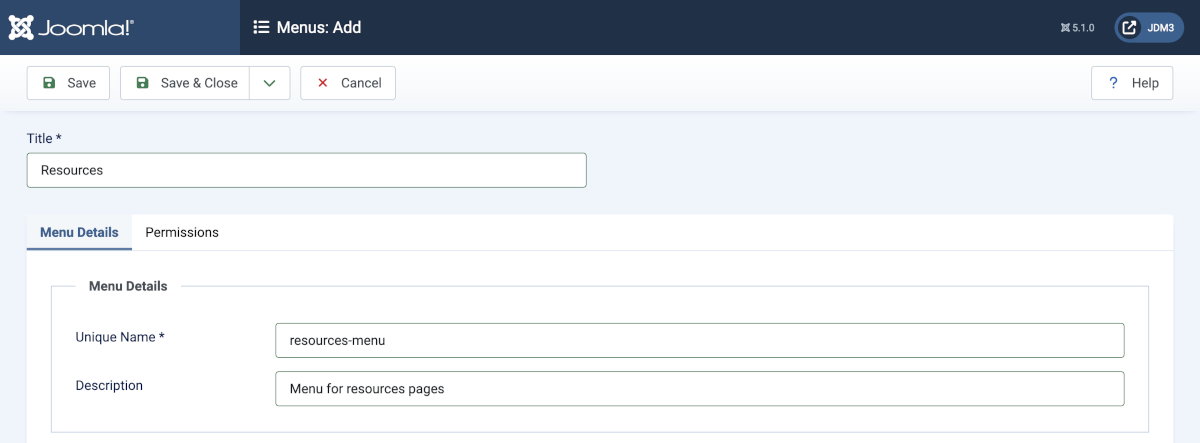
- In the Menu data entry form complete the following fielss:
- Title: A proper title for the menu. This is used to identify the menu in the Menu Manager.
- Unique Name: This should be a unique identification name used by Joomla! to identify this menu. Spaces are not allowed but you may use the '-' character such as resources-menu.
-
Description: Although not required this is often useful in a site with
many menus. It appears below the Title in the menu list as illustrated
above.
- Save & Close
In the list of Menus the newly created menu has a button laballed Add a module for this menu, which is the next stage in menu creation. You could start adding menu items and come back to create the menu module later.
Create a Module for the Menu
In the Menus list the Linked Modules column allows selection of any existing menu module for editing purposes. You can have a look and then Close without making any changes. For your new menu, select the Add a module for this menu button to open a modal frame containing the Menu module data entry form.
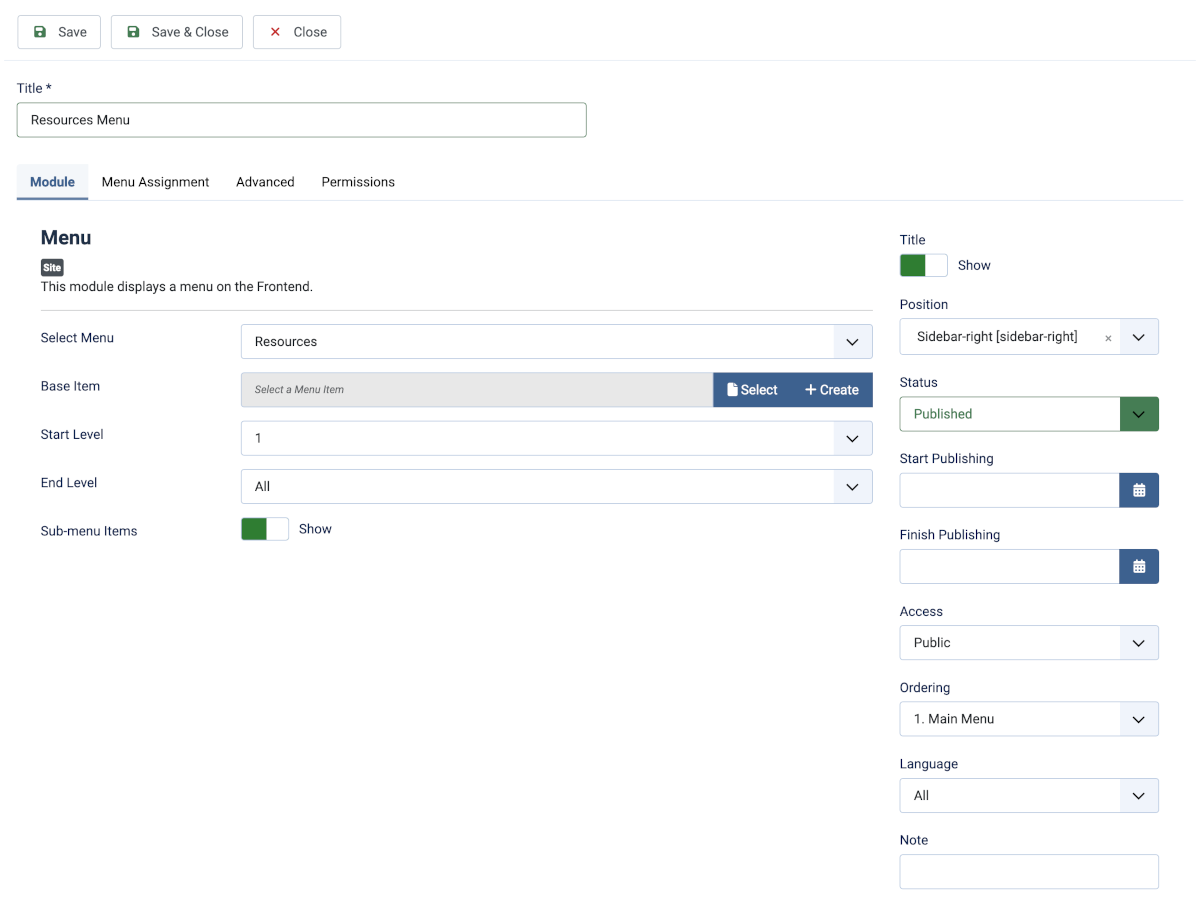
Fields to complete:
- The Title field is required, so create a descriptive title.
- The Show Title button on the right is used to Show or Hide the module title, a common feature of all modules.
- The Select Menu field should show the name of the Menu you just created.
- The Position field is used to select a position in your template where you want your menu to appear.
- Select Save & Close once the essential information has been added.
There are many options to choose from in the Edit module settings form. They are mentioned in the Help screen available in the Module: Edit form. This is the same form but in a normal page rather than a modal frame. Access it via the Administrator menu, Content / Site Modules route to the list of Site Modules.
Note: getting the Menu to look the way you want it to depends on your template styling.
Add Items to the Menu
To create the links in your menu you need to add Menu Items. There are many Menu Item Types in Joomla and third-party components may add more types. For this tutorial a link to a single article will be added.
You can create an article in advance or you can create an article during the menu creation process. Either way, the article must exist before a menu item can be created for it. In this example the article will also be named Resources. It is intended to contain a list of links to PDF files.
In the Menus list, from the Menu Items column select the icon for the newly created menu, Resources in this example. Initially, there are no menu items so the list merely says No Matching Results.
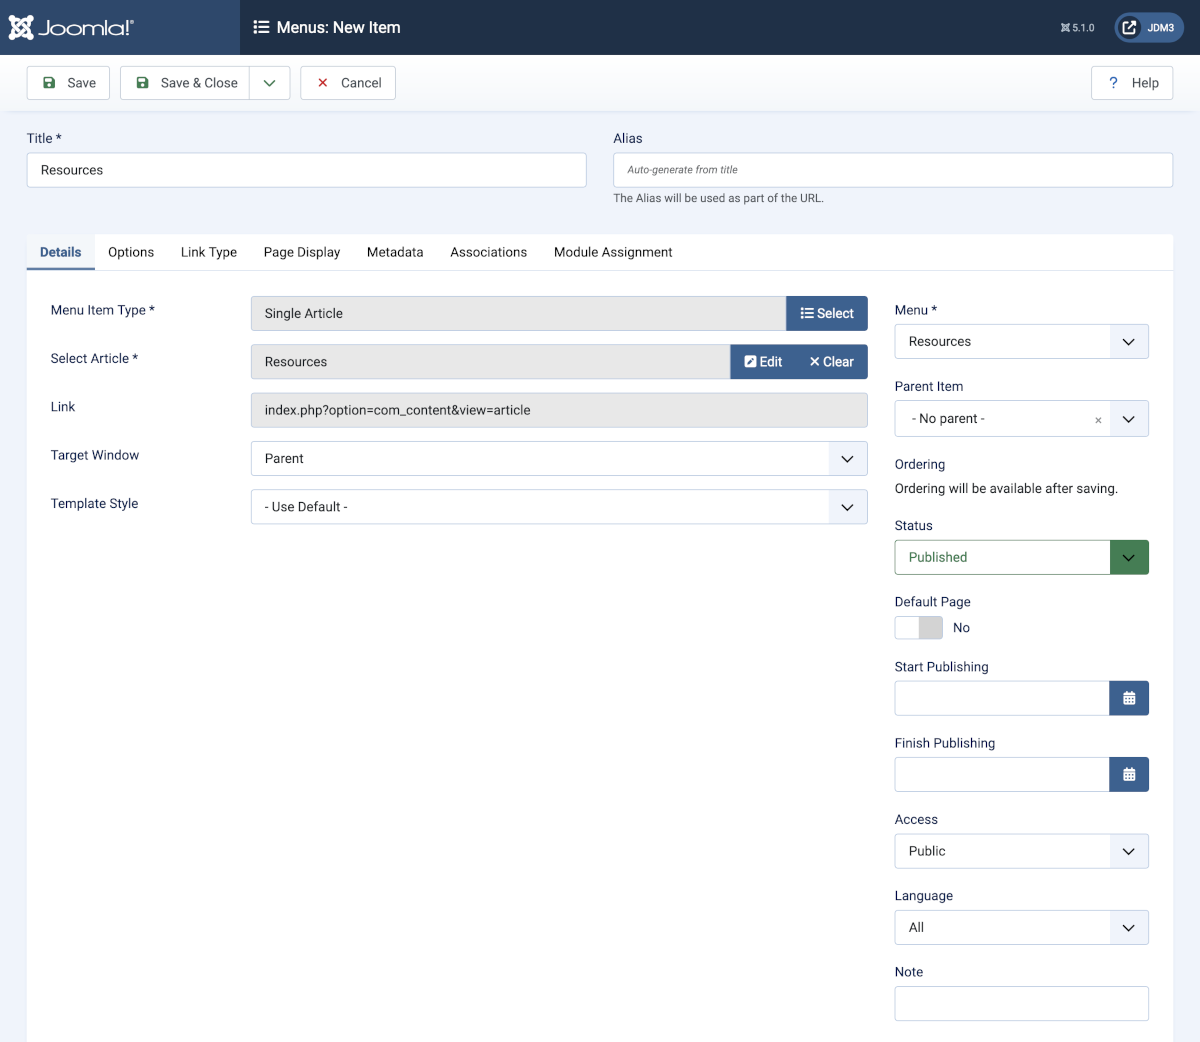
- Select the New button from the Toolbar to create a new menu item.
- In the Title field add the title you want to appear in the Menu.
- In the Menu Item Type field select the Select button to open a modal
dialog containing a list of components. Each has a drop down list revealing.
a list of available menu item types.
- Select Articles then Single Article.
- In the Select Article field: Either:
- Use the Select button to select an existing article. It will open a list of articles to choose from. Or:
- Use the Create button to create a new article. All you need to enter is the article title. It is probably best to leave detailed content until later.
- Check the Menu field is set to the new Menu.
- The Status field should be set to Published.
- Select Save & Close.
Add more Menu Items to the new Menu as required.
Once items have been added to the Menu check to see that the Menu is displayed on the website in the correct position.
