Joomla User Manual
Manual Index
Installing Joomla
Introduction
Installing Joomla! for the first time is very easy. After completion of the preliminary steps, setting up a hosting environment and creating a database, Joomla’s built-in web installer will set up your new site in just a few minutes. The previous steps:
Hosting Setup
If you have not yet set up a hosting environment you need to do it now, either on a hosting service or your local computer.
Also, there are some PHP settings that need to be sufficient for Joomla to install. The settings are usually in a php.ini or user.ini configuration file on the server. If you are on shared hosting, talk to your hosting service about how to change these settings if it is possible to do so. If working on a localhost, for example with XAMPP, or a VPS or dedicated host, you should not be restricted by these settings and can set them yourself.
The minimum values for the php.ini file are shown below:
- memory_limit: 256M
- upload_max_filesize: 64M
- post_max_size: 64M
- max_execution_time: 30
It is possible to work with lower values of upload_max_filesize and post_max_size but larger extensions will fail to upload and cause unpredictable problems.
Database Setup
If you have not yet set up a database do it now. It is covered for a cPanel hosting service in the cPanel Hosting tutorial. There is also a Creating a Database for Joomla! tutorial that covers localhost and phpMyAdmin methods.
You will need to note basic database information needed when the actual Joomla installation is started.
- Location of database, usually localhost even on a hosting service.
It can be a specific host's server such as
dbserver1.yourhost.com. - The database name
- The database user's name
- The database user's password
Prepare for Install
Downloading and Uploading Joomla! Package Files
Download the current release of Joomla! from the link on the Download Joomla page
Move the downloaded Joomla installation package zip file to the server. For a hosting service you may use the cPanel File Manager Upload function or you may use an FTP Client to transfer the downloaded Joomla 5.x zip file to your server. There are several FTP clients available. Here is a detailed Comparison of FTP client software. If in doubt, use FileZilla.
It is better to move the downloaded zip package to your server and
unpack it there than to unpack it locally and then move the file tree.
Normally you upload your web files to the root folder of your hosting
service. This is typically named public_html but other variations
include htdocs and this depends on how your host has the set up the
server. For Joomla purposes, you can load the files directly into
public_html or a sub-folder you have created within it.
Warning: If you unpack the files on your own computer, then copy them to
your server, be sure to move only the folders and files contained inside
the Joomla package. If you unpack the folders and files into a folder,
for example called, Joomla and then upload that folder, your site
will have to be accessed at yoursitename.com/Joomla instead of
yoursitename.com. You can rename the sub-directory from Joomla to
something more site appropriate, such as jblog, and you might find that
convenient. Note: directory names should be lower case, without
spaces and using minus signs rather than underlines to separate words.
The zip package files can be extracted directly on the host using various command line tools (e.g. unzip), which needs to be installed on the server. If your hosting service uses the admin tool cPanel, the Extract button can be pressed in the File Manager. Apart from that, the free third-party Akeeba Kickstart tool may also be used for this purpose. The unzipped files and directories will be placed in the current folder. Extraction on your local computer depends on your OS. Try a right-click and see if there is an extract menu. In this case your OS may put the files in a folder with the same name as the zip file. After extraction you may delete the zip file and rename the extraction folder to something short and suitable for use in a url.
Start Install
With the above requirements met, a database created and the required
Joomla files in place, you are ready to install Joomla. Start the Joomla
web installer by opening your favourite browser and browsing to the
site's domain name. On a hosting installation you will use
https://www.yoursitename.com. If your are installing Joomla locally,
you will use http://localhost/ and you should see the installation
screen.
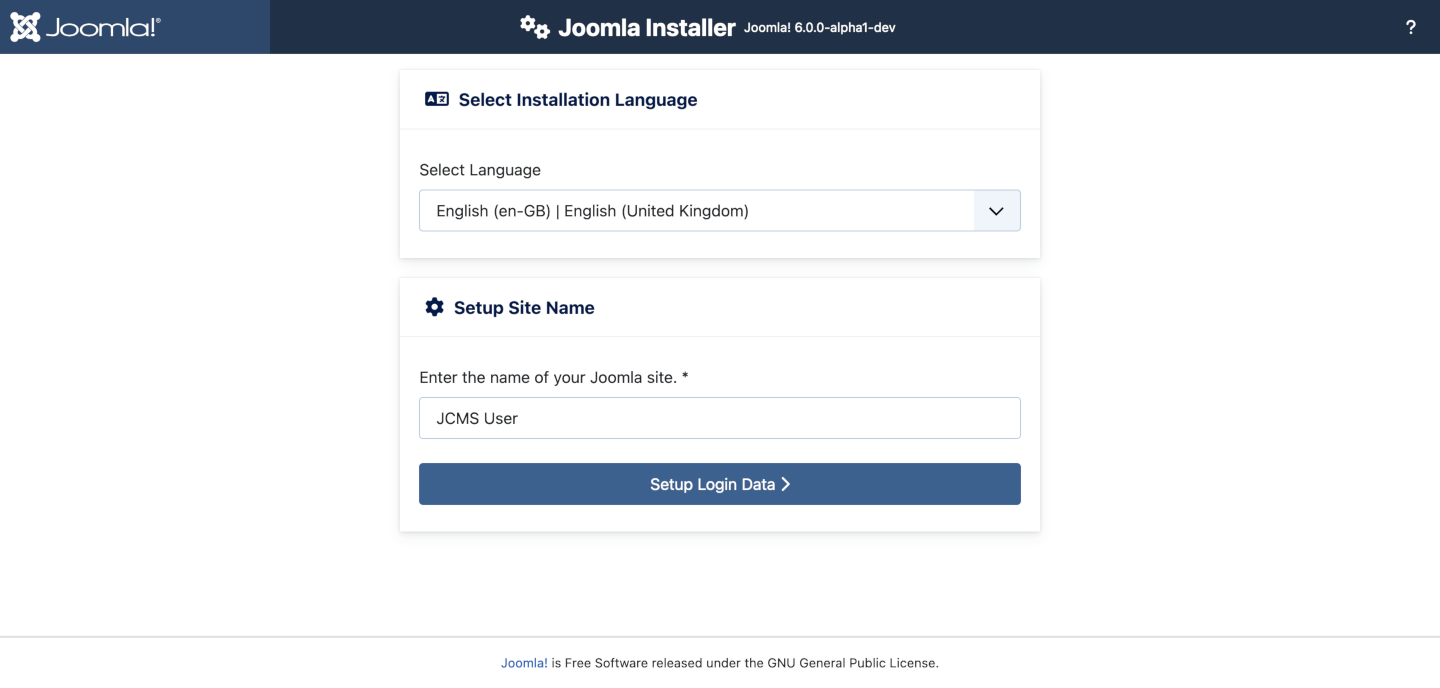
Joomla will try to identify the Select Language field automatically from your browser's language. You can change this if needed.
Fill in the following information.
- Site Name The name of your website — this can be changed at any point later in the Site Global Configuration page.
When everything on the first page is completed, select the Setup Login Data button to proceed.
Login Data
You should now see the login data screen.
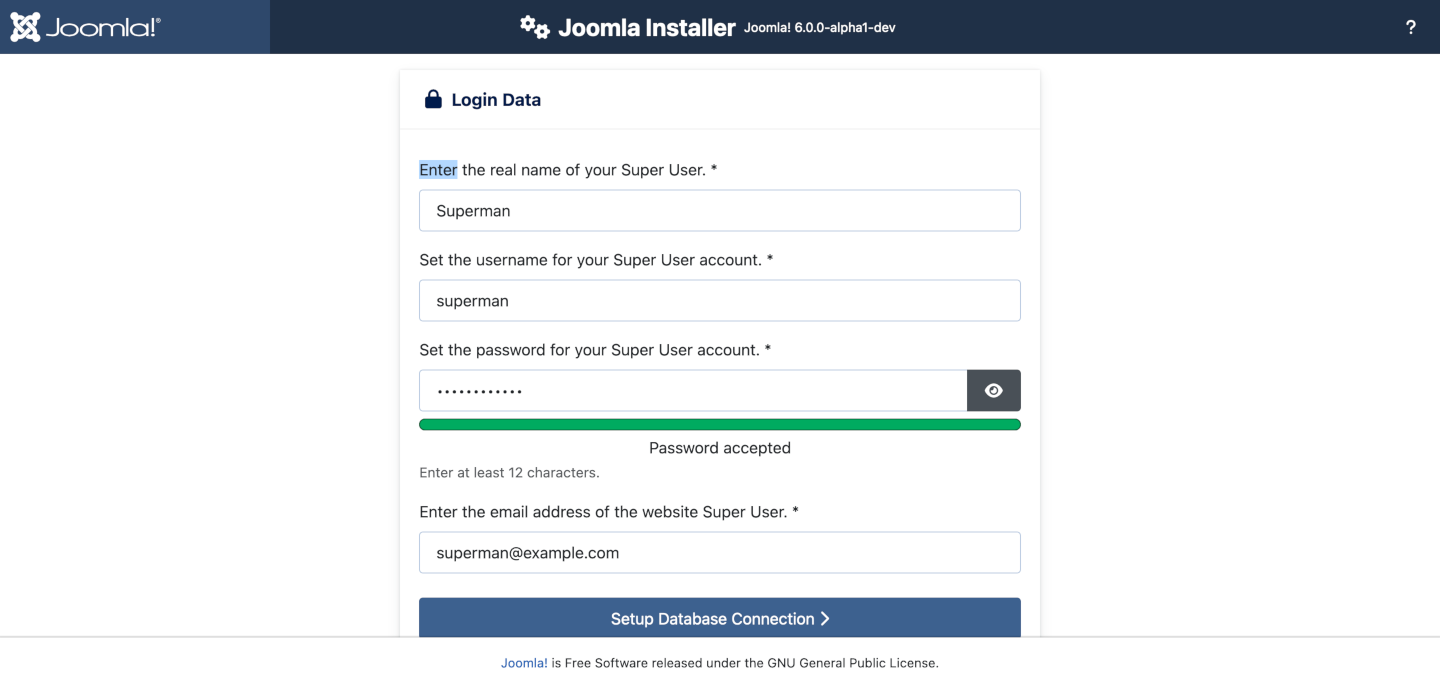
Fill in the following information.
- Real Name The name of the Super User. This is how Joomla will greet you when you log in.
- Super User account username The username for the Super User. Avoid using admin as the Administrator name!
- Admin Password Remember that a Super User has maximum control of the Site and Administrator interfaces, so use a difficult password. Use My Profile in the Administration interface to change it later.
- Super User Email Address The Super User email address. Enter a valid email in case you forget your password. This is the email address where you'll receive a link to change the Super User password.
When everything on the second page is completed, select the Setup Database Connection button to proceed.
Database Configuration
Enter the database information noted down when you created the database for this installation.
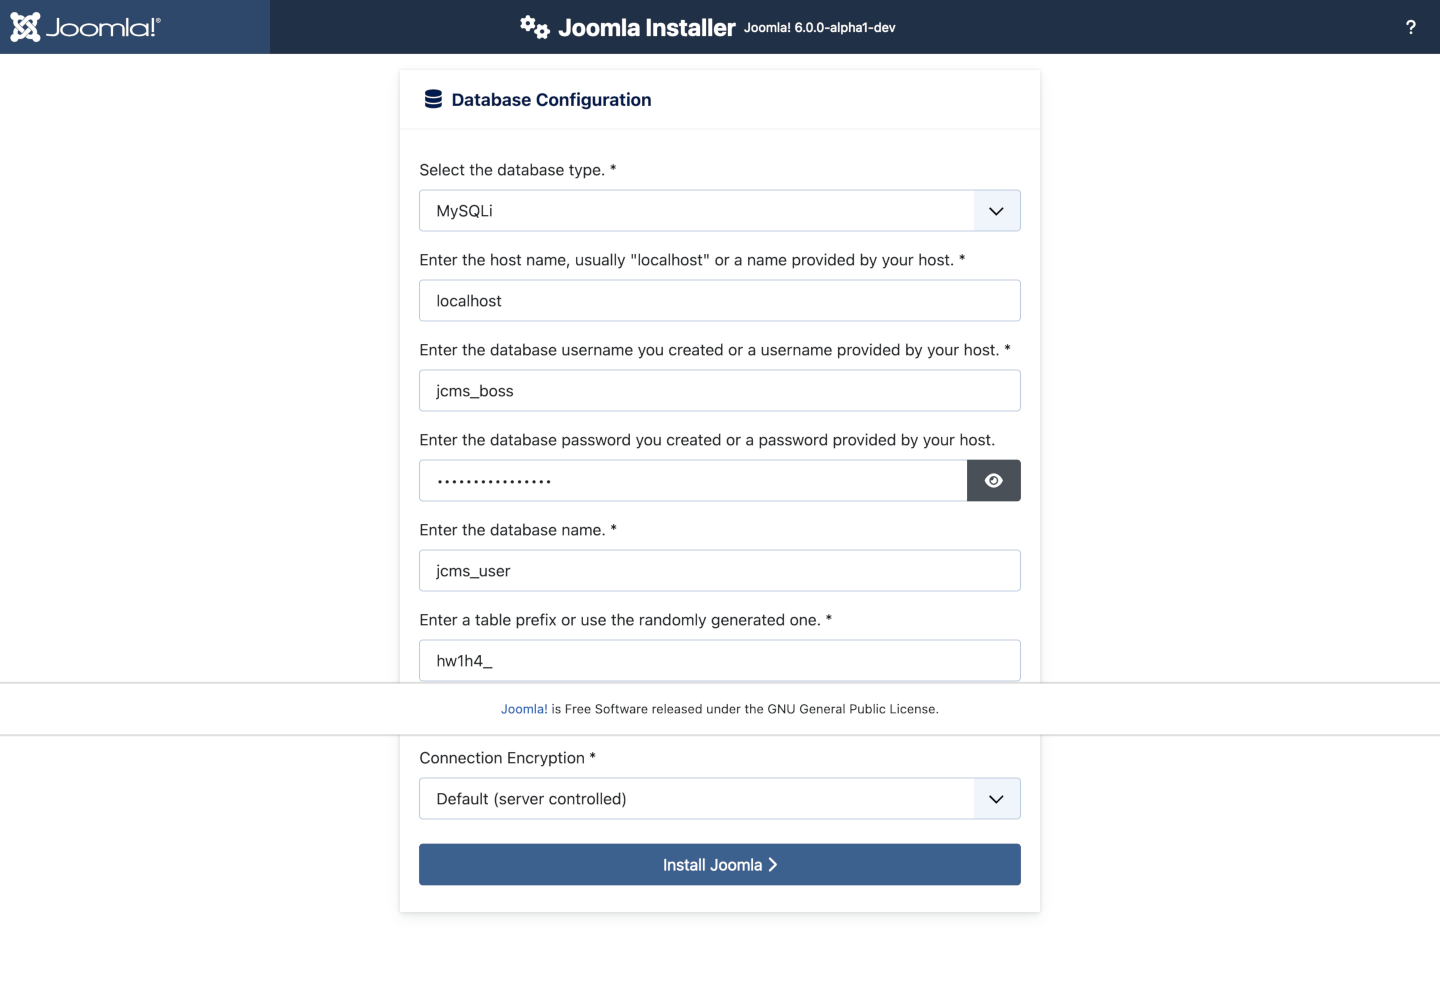
For simplification, these instructions are a reference to installing with a MySQLi database. The instructions on the installation page are self explanatory, but here they are again:
- Database Type MySQLi is the common database used
- Hostname Where your database is located. Common is localhost, even on hosting services. However, some hosts use a specific database server such as dbserver1.yourhost.com.
- Username The username used to connect to the database
- Password The password for the database user (not your Administrator password)
- Database Name The name of the database
- Table Prefix This is generated automatically as a security
feature. You can accept the randomly generated default or change it.
Just don't forget to put the underscore character (
_) at the end of the prefix. - Connection Encryption specifies how the connection to the database should be encrypted. If you don't know - then it's best to stick to the default. However this allows enterprises that use one or two way authentication for the database connection to provide it.
All these choices and more can be edited on the Site Global Configuration page, under Server Options after the installation is completed. Note, you will break your installation if you change these settings after installation unless you have a complete copy of the current database being used by the Joomla installation. Common uses would be to update the username and password of the database or to complete a move of an existing installation to a new host with different parameters.
After you select the Install Joomla button, you should see the Joomla installation progress bar.
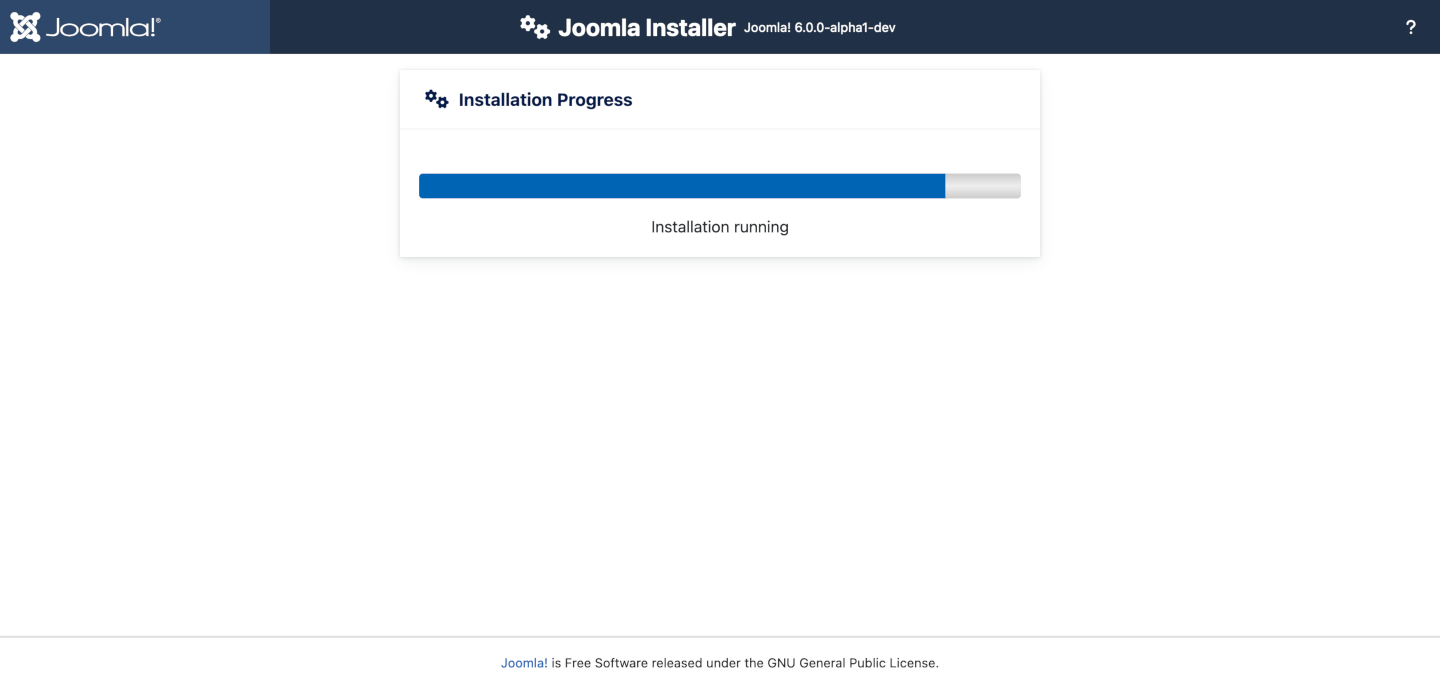
Once the installation completes, you should see the success page.
Finishing Up
Success and Finishing Up the Installation
Congratulations! Your Joomla site is ready.
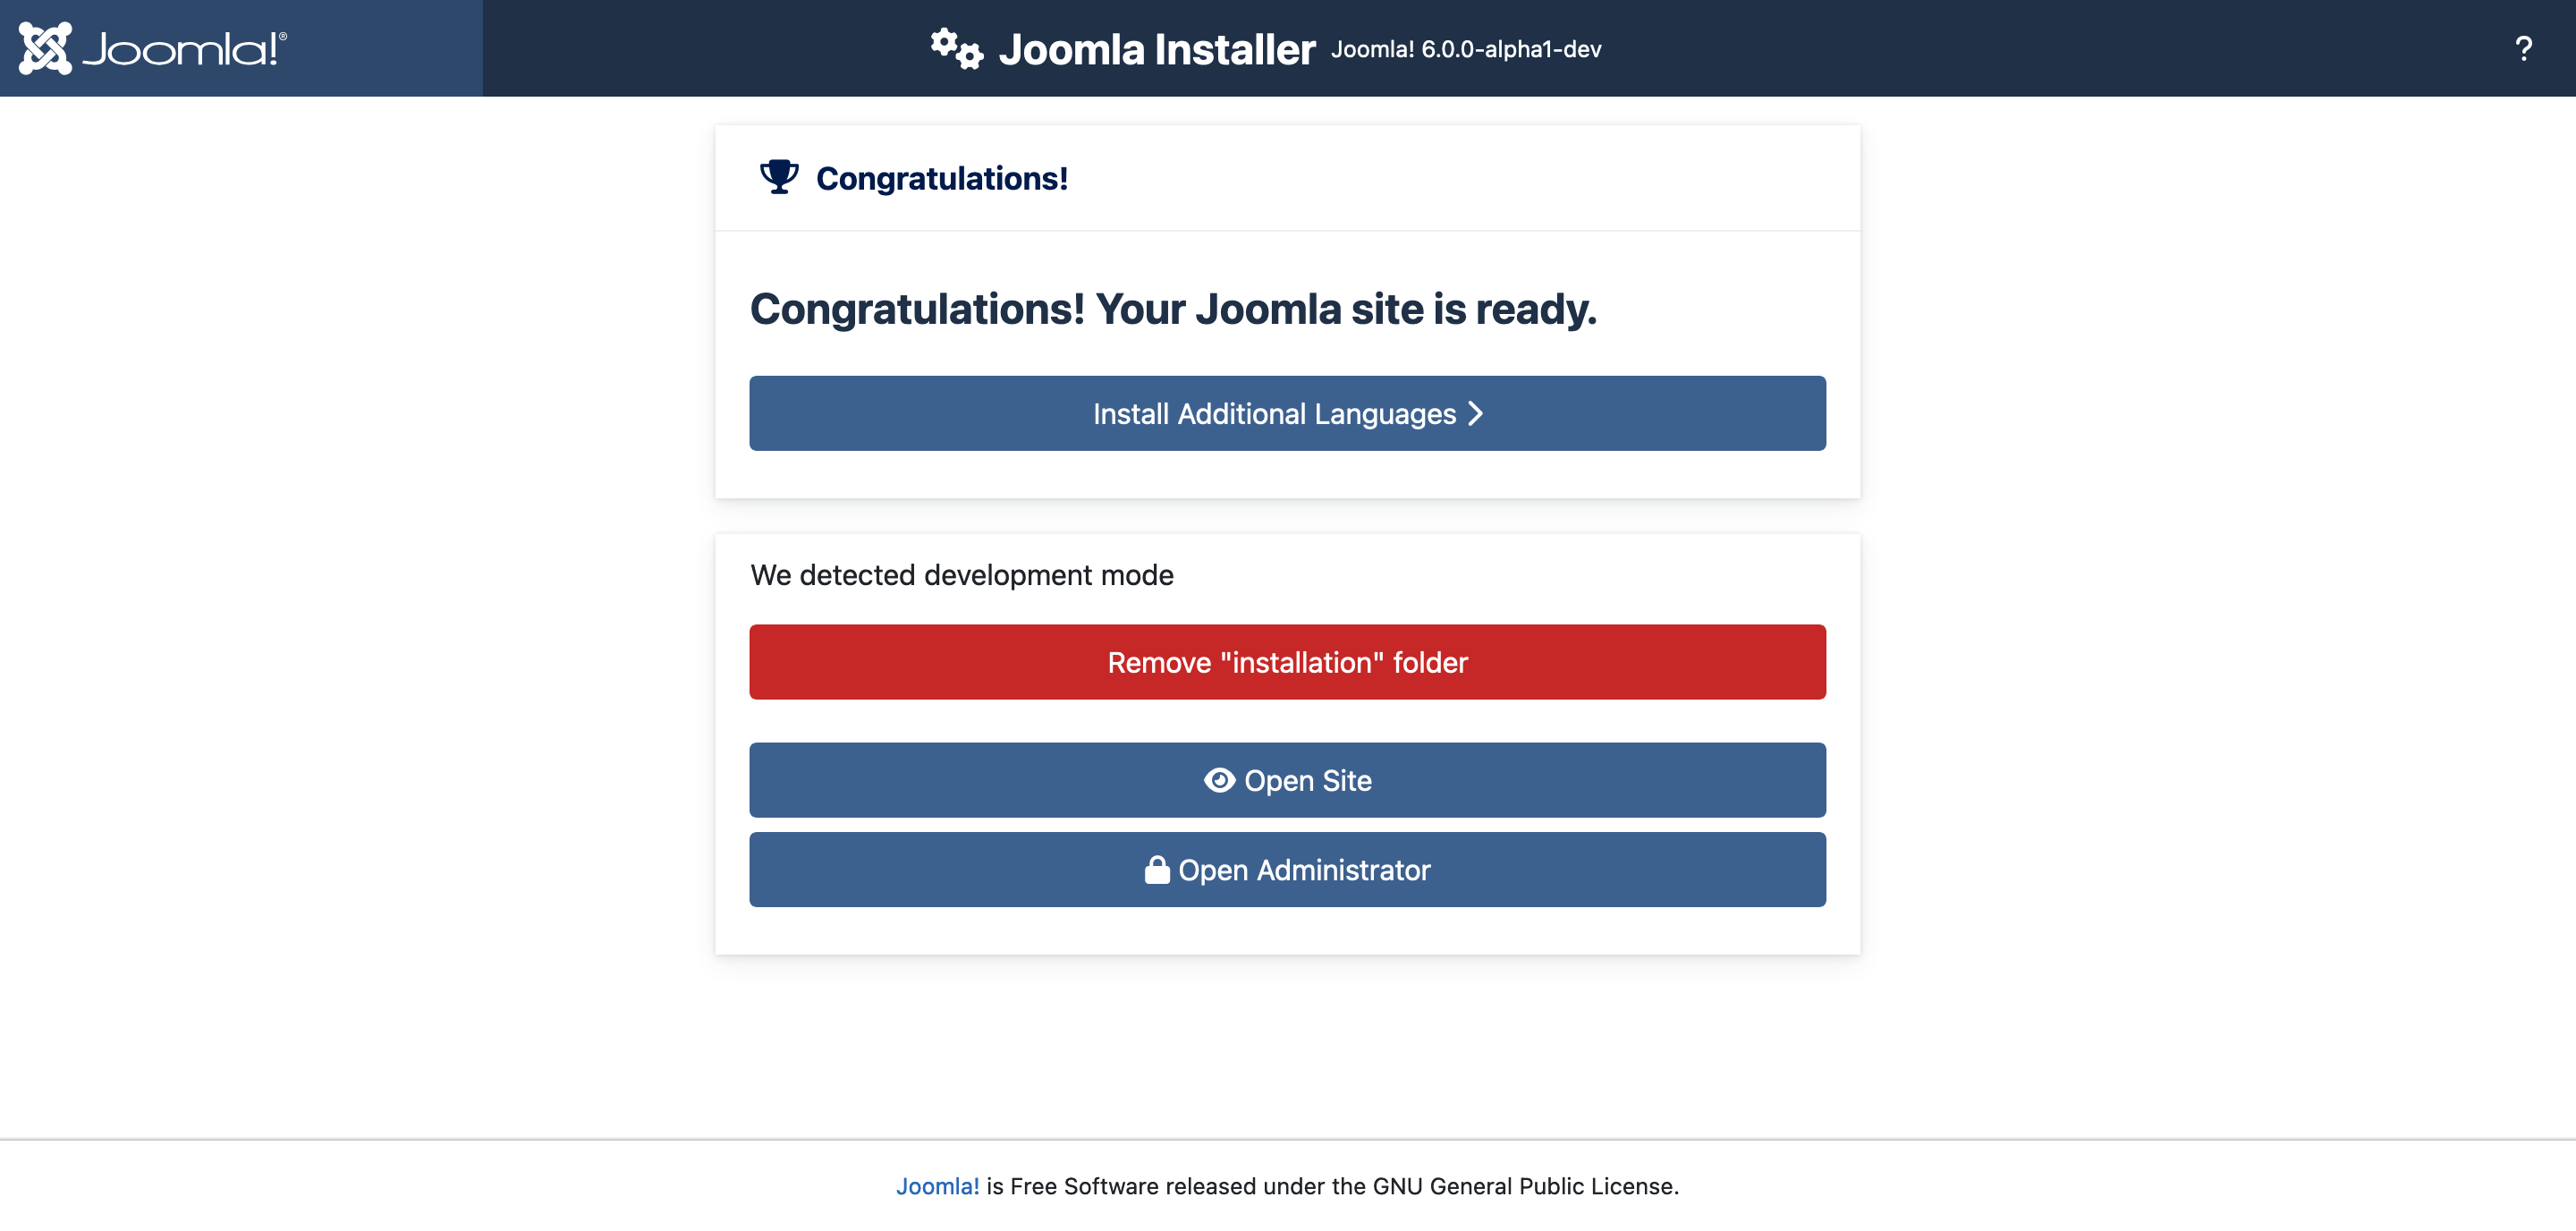
The screenshot above shows a developer installation. A production installation Automatically removes the Installation folder.
If you want to start using Joomla right away without installing extra languages you can select Open Administrator to go to the Administrator Dashboard or select Open Site to go to the Site Home page. You may see a section with recommended PHP settings.
- Recommended Settings These settings are recommended in your PHP configuration, but will not prevent Joomla! from being installed. You can refer to the above instructions on how they may be changed if there is a need to do so.
Extra Languages
As part of the Joomla installation process you are given the opportunity to install additional languages before you complete the installation.
To do this select the Install Additional Languages button
This will take you to an extra installation page allowing you to select the languages you require.
Install Additional Languages
A list of language packs is displayed.
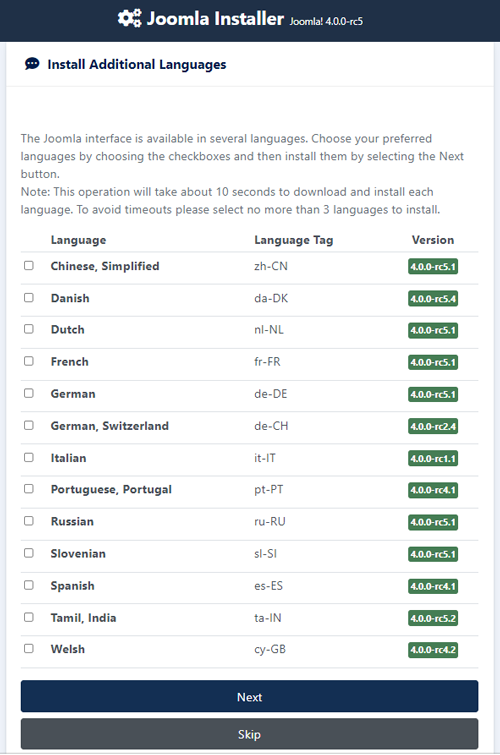
Select up to 3 languages you wish to install. (More than 3 at once can cause timeout issues; you can install more later.)
Remember the following:
- Language packs included in custom distributions will not be listed at this stage as they are already installed.
- A version of the packs proposed will match the Joomla Major version (5.0.x, 5.1.x, etc.). The minor version of the pack may not correspond, e.g. you are installing version 5.0.3 and a 5.0.2 language pack is shown.
- Unmatched language packs in the above example may have untranslated strings.
- The unmatched language packs will be offered as an update when the packs are updated by the registered Translation teams. The available update will be shown in the Control panel as well as in Extensions → Update. This behaviour is similar to Extensions → Install Languages.
Select Next and a progress bar will be displayed while the language pack or packs are installed.
Choose the Default Language
When the installation of the languages is complete you will now be presented with a similar Congratulations! Your Joomla site is ready. screen. The difference will be a list of the installed languages allowing you to select the default language for the Site and the Administrator interface.
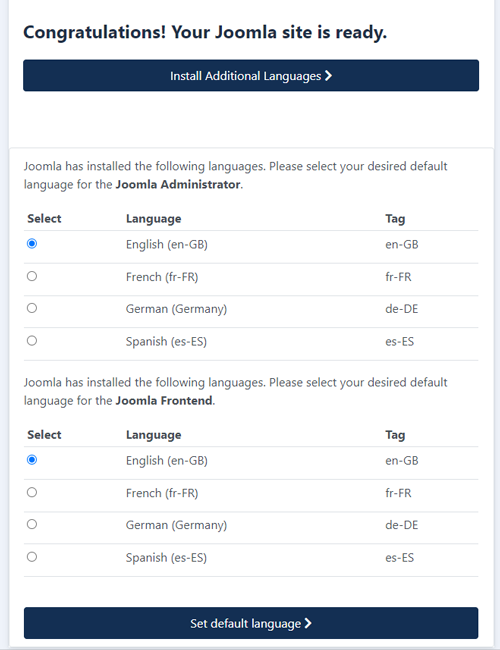
- Select the default language you wish to use.
- When you have selected the default language, select the Set default language button to confirm.
- A system message will be displayed confirming Joomla has set the default ADMINISTRATOR and SITE language. That message can be closed.
Finalise
You can now can navigate to the Administrator Dashboard. Log in by selecting Open Administrator or go right to your site Home page by selecting Open Site.