Joomla User Manual
Manual Index
Article: Edit - Tables
About Tables
In HTML, tables consist of rows and columns of cells. For example, a simple table may consist of 4 rows and 4 columns, giving 16 cells. However, cells can be combined either horizontally or vertically to create quite intricate table structures. Tables also have not so obvious features such as a header, body, footer and captions. Tables can be nested!
By default, table cells expand to accommodate their content. The only
styling comes from the table markup: by default, header cells (<th>) have
bold, centred text while data cells (<td>) have normal, left aligned text.
Table usage should be reserved for strictly tabular data, such as a Timetable or a Calendar, where it is important to maintain the row and column structure. Tables should not be used for layout, such as placement of images or text side by side.
There is more information in the following articles:
Tables are a dilemma! If you insert a table using the TinyMCE table tools the table will look good in the edit screen and the site but the layout is achieved with in-line css styles which can be voluminous and difficult to edit. If the table is inserted as pure html the result does not look good in the TinyMCE text editor but it can take advantage of Bootstrap classes and look much better on the site. Both methods are covered below.
Insert a Table with TinyMCE Tools
To get started with a table:
- Open the article you wish to edit.
- Place the cursor on a blank line where the table is to appear.
- Select the Table button in the first row of TinyMCE tools.
- In the drop-down menu select Table and then move the cursor to define the number of rows and columns. The keyboard arrows work for this too.
- Select the last cell in the 4x4 matrix.
- Fill in the table cells.
Editing options:
- You can insert a row above or below a selected cell.
- You can insert a column before or after a selected cell.
- You can delete a row or column.
- You can drag column borders to change column widths or heights.
- You can merge cells - drag over the cells to select them and then use Table -> Cell - > Merge cells.
- You can select Table Properties including border width, style and colour and background colour.
If you use the Toggle Editor button you will see the layout is achieved with inline style statements on every row and every cell. Here is a short sample"
<table style="border-collapse: collapse; width: 100%; height: 96px;" border="1"><colgroup><col style="width: 24.9735%;"><col style="width: 24.9735%;"><col style="width: 24.9735%;"><col style="width: 24.9735%;"></colgroup>
<tbody>
<tr style="height: 24px;">
<td style="height: 24px;">Day</td>
<td style="height: 24px;">Morning</td>
<td style="height: 24px;">Afternoon</td>
<td style="height: 24px;">Evening</td>
</tr>
<tr style="height: 24px;">
<td style="height: 24px;">Tuesday</td>
<td style="height: 24px;">Welcome</td>
<td style="height: 24px;">Presentations</td>
<td style="height: 24px;">BBQ</td>
</tr>
...
</tbody>
</table>
Insert a Table as HTML
If you prefer you could dispense with inline styles and use Bootstrap classes. You would have to modify the table created by TinyMCE Table tools or type it yourself. It would look like this:
<div class="table-responsive">
<table class="table table-striped table-bordered table-group-divider">
<thead>
<tr>
<th>Day</th>
<th>Morning</th>
<th>Afternoon</th>
<th>Evening</th>
</tr>
</thead>
<tbody class="table-group-divider">
<tr>
<th>Tuesday</th>
<td>Welcome</td>
<td>Presentations</td>
<td>BBQ</td>
</tr>
...
</tbody>
</table>
</div>
Here, the Bootstrap classes Have the following effects:
table- applies several styles to give a nice standard table layout.table-striped- alternate rows are dark and light.table-bordered- applies borders to cells.table-group-divider- applies a bold line above an element.table-responsive- allows a wide table to scroll right-left.
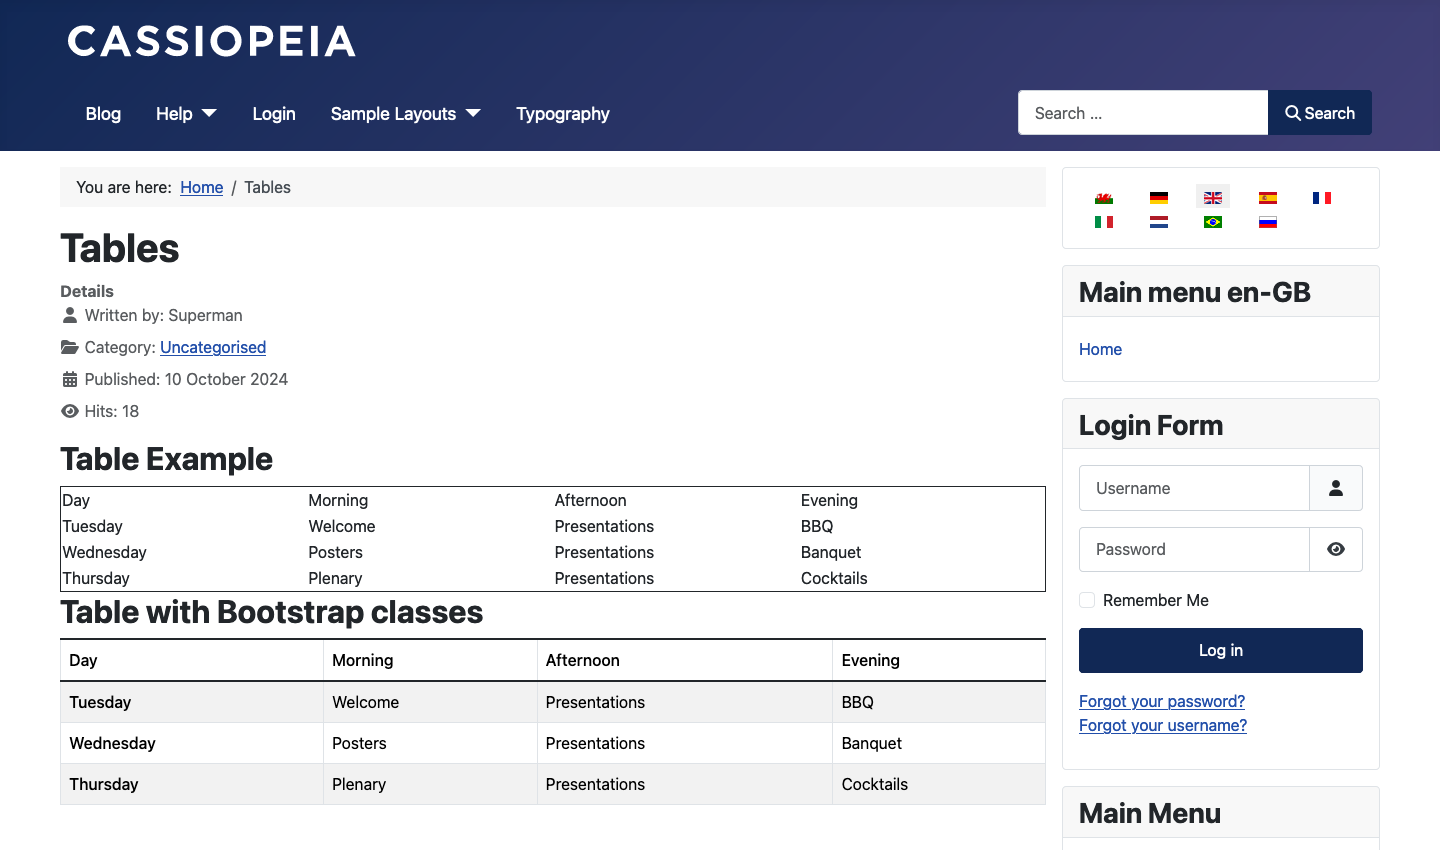
The following Site screenshot shows a table for a conference programme with the TinyMCE default inline styles and a similar table with Bootstrap styles:
See the Bootstrap documentation on Tables for more options.
Afterthought
You could place the HTML for a table in a Custom module and include that module
in the article. In the article that appears as {loadmoduleid xx} where xx is
the module Id.