Joomla User Manual
Manual Index
Custom Administrator Menu
Introduction
Suppose you have a user who you wish to allow to perform one task only on your website. Take the case of an organisation that has branches all over the world and the only task each branch is allowed to perform is to place locations on a map for display on the site. The component for this task is Ffmap but that will not be covered here other than the Administrator menu items involved.
To accomplish this task you need to create a custom User Group, assign a user to that group and create a custom menu for use by that user.
Create a User Group
- Select User → Users → Groups in the Administrator menu.
- Select the New button in the Toolbar.
- Enter a Title for the Group, Branch' in this case.
- Select Public as the parent group. This is important - you do not want to inherit permissions from another group.
- Select Save and Close from the Toolbar.
Set Global Permissions for the Group
- Select Global Configuration from the Home Dashboard.
- Select the Permissions tab.
- Select the Branch item.
- Set Administrator Login to Allowed.
- Select Save and Close from the Toolbar.
At this stage any user assigned to the Branch User Group will be able to login to the Administrator interface and see the Home Dashboard. There may be dashboard modules visible because their access level has been set to Public, for example: Logged in Users, Popular Articles and Recently Added articles. Best set access to these modules to Special. There will be no menu items for the user to see.
Set Component Permission for the Group
Either:
- Select Ffmap component in the Administrator menu.
- Select the FFmap Options button from the Toolbar to open its Configuration screen.
Or:
- Select Global Configuration from the Home Dashboard.
- Slect Ffmap from the list of components.
Then:
- Select the Permissions tab and then the Branch item.
- Set Access Administration Interface, Create, Delete, Edit, Edit State, Edit Own and Edit Custom Field Value to Allowed.
- Select Save and Close from the Toolbar.
Create a new Administrator menu
- Select Menu → Manage from the Administrator menu.
- Select Administrator from the Site/Administrator drop down list.
- Select the New button from the Toolbar.
- Enter a title for the menu, say Branch Menu and a unique id, say branch-menu.
- Select Save and Close from the Toolbar.
Create a Module for the menu
In the Menus list, select the Linked Modules button in the Branch Menu record.
- Enter a Title for the module, say Branch Menu.
- Select Menu to Show: Branch Menu.
- Set Check Menu to No, otherwise there are awrning messages about missing Administrator functions.
- Select the position: menu.
Create a Components Menu Container
- In the Menus list select the Menu Items icon for the Branch Menu. This will open the list of items, empty at this stage.
- Select the New button from the Toolbar.
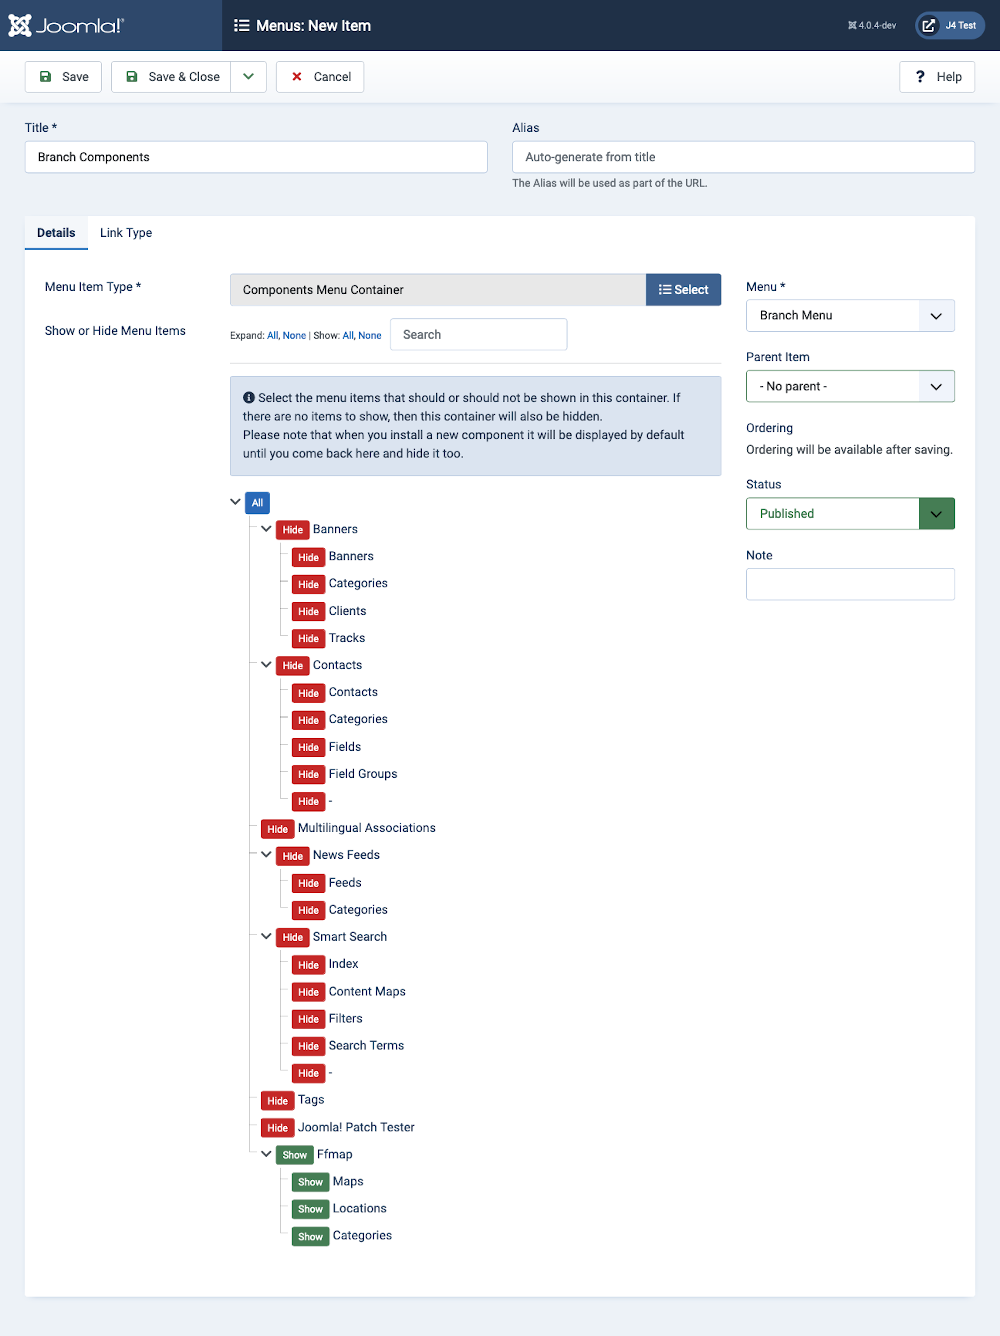
- Enter a title for the menu item: Branch Components.
- Select the Menu Item Type Select Button.
- In the modal dialog, scroll down to the System Links item and expand the pane.
- Select the Components Menu Container item type.
- Back in the menu configuration form, select Show None to Hide all of the Components menu items (red).
- Scroll down to the Ffmap items and click the Hide buttons to turn them to Show (green).
- Select Save and Close from the Toolbar.
Screenshot

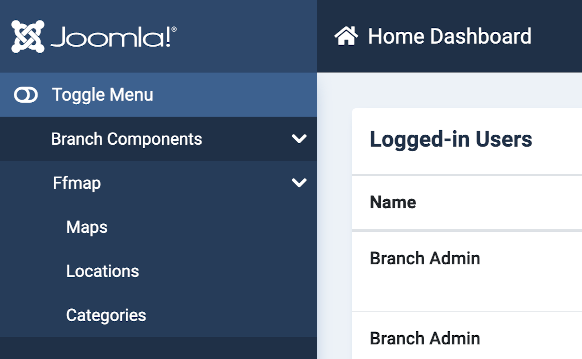
Result
Create a user in the Branch Group for yourself to test with. Login to the Administrator interface as that user to see the result:

Notes
If you later add another component it will be added to the Components Menu Container and visible by default. You will need to go back to Administrator menu item and set the new content to Hide.
If the component is set up to include menu items in each of the Administrator list views, by inclusion of default.xml files, you could add menu items directly to the custom menu and avoid using the Components Menu Container.
The Branch Components menu will remain part of the Administrator menu - unavoidable duplication!