Joomla Help Screens
Manual Index
Redirects: Links
Description
This component is used for redirecting URLs for web pages that no longer exist on your website to web pages that are working. The URL you want to redirect from must not be a working one on your website which actually loads a web page. It can be the URL to a web page which you have disabled. The Expired URL you specify when you create the redirect should be the full URL as you would type it in your web browser. The component will only display the last portion of the source URL in the redirect listing. The New URL you specify when you create a redirect must be the full URL as well. You must have the Use URL Rewriting option enabled in your Joomla! installation Global Configuration options in order for the redirects you create to function.
How to access
- Select System → Manage panel → Redirects from the Administrator menu.
Screenshot

Column Headers
Click on the column heading to sort the list by that column's value.
- Checkbox. Check this box to select one or more items. To select all items, check the box in the column heading. After one or more boxes are checked, click a toolbar button to take an action on the selected item or items. Many toolbar actions, such as Publish and Unpublish, can work with multiple items. Others, such as Edit, only work on one item at a time. If multiple items are checked and you press Edit, the first item will be opened for editing.
-
Status: Published status of the item. Possible values are:
- Published: The item is published. This is the only state that will allow regular website users to view this item.
- Unpublished: The item is unpublished.
- Archived: The item has been archived.
- Trashed: The item has been sent to the Trash.
- Expired URL. The URL which is being redirected on your website. Only the web page portion of the URL is displayed in this listing.
- New URL. The destination URL for the redirect.
- Referring Page. The referring web page for the redirect.
- Created Date. Date the item(Article, Category, Weblink, etc.) was created.
- 404 Hits. Number of 404 Hits there has been on this URL.
- Status Code. The Status Code of the page.
- ID. This is a unique identification number for this item assigned automatically by Joomla. It is used to identify the item internally, and you cannot change this number. When creating a new item, this field displays "0" until you save the new entry, at which point a new ID is assigned to it.
List Filters
Search bar. Near the top of the page you will see the search bar shown in the Screenshot above.
- Search by Text. Enter part of the search term and click the Search icon. Hover to see a Tooltip indicating which fields will be searched.To 'Search by ID' enter "id:x", where "x" is the ID number (for example, "id:19").
- Filter Options. Click to display the additional filters.
- Clear. Click to clear the Filter field and restore the list to its unfiltered state.
-
Ordering. Shows the current list ordering field. 2 ways to change
the order:
- Select from the dropdown list. Ordering may be in ascending or descending order.
- Click a column heading. The column heading toggles between ascending and descending order.
- Number to Display. Shows the number of items in a list. Select from the dropdown list to change the number displayed.The default for a site is '20' but this may be changed in the Global Configuration.
Filter Options
- Status
- HTTP Status code
Page Controls. When the number of items is more than one page, you will see a page control bar near the bottom of the page shown in the Screenshot above. The current page number being viewed has a dark colour background.
- Start. Click to go to the first page.
- Prev. Click to go to the previous page.
- Page numbers. Click to go to the desired page.
- Next. Click to go to the next page.
- End. Click to go to the last page.
Batch Processing
Below the listing of redirects, is a section named 'Batch update new URL(s)'. This function allows you to change the 'New URL' for the selected redirects.
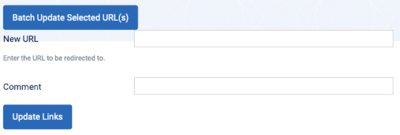
- New URL. The destination URL to set for the selected redirects.
- Comment. The comment to set for the selected redirects.
- Update Links. Updates all selected redirects with the specified New URL and Comment.
Toolbar
At the top of the page you will see the toolbar shown in the Screenshot above. The functions are:
- New. Opens the editing screen to create a new item.
- Actions: Reveals a list of actions for selected Items. Check one or more Item checkboxes to activate the list.
- Enable. Makes the selected item available for use on your website.
- Disable. Makes the selected items unavailable for use on your website.
- Archive. Changes the status of the selected items to indicate that they are archived. Archived items can be moved back to the published or unpublished state by selecting 'Archived' in the 'Select Status' filter and changing the status of the items.
- Trash. Changes the status of the selected items to indicate that they are trashed.Trashed items can still be recovered by selecting 'Trashed' in the 'Select Status' filter and changing the status of the articles to Published or Unpublished as preferred.To permanently delete trashed items, select 'Trashed' in the 'Select Status' filter, select the items to be permanently deleted, then click the 'Empty Trash' toolbar icon.
- Empty Trash. Select one or more Articles and click on this button to permanently delete them.
- Bulk Import. Bulk process to add new URLs.
- Purge Disabled. Deletes all disabled links. URL's that are still enabled will not be deleted.
- Options. Opens the Options window where settings such as default parameters can be edited.
- Help. Opens this help screen.
Options
Click the Options button screen to configure this component.
Quick Tips
- In order for your redirects to work, you must enable the option Use URL Rewriting in the Global Configuration options of your Joomla! installation. Note also that just enabling the 'Use URL Rewriting' option is not enough. You must take the additional step of renaming the htaccess.txt file in the web site directory where you installed Joomla! to .htaccess or to whatever file name your Apache web server requires for additional configuration directives. In the Apache configuration file this setting is named 'AccessFileName' and by default this is set to '.htaccess'.