Joomla Developer Manual
Manual Index
XAMPP
Introduction
XAMPP is an easy-to-install package that bundles the Apache web server, PHP, XDEBUG, and the MySQL database. This allows you to create the environment you need to run Joomla! on your local machine. The latest version of XAMPP is available at the XAMPP web site. Downloads are available for Linux, Windows, Mac OS X and Solaris. Download the package for your platform.
Important Note Regarding XAMPP and Skype: Apache and Skype both use port 80 as an alternative for incoming connections. If you use Skype, go into the Tools-Options-Advanced-Connection panel and deselect the "Use 80 and 443 as alternatives for incoming connections" option. If Apache starts as a service, it will take 80 before Skype starts and you will not see a problem. But, to be safe, disable the option in Skype.
Installation on Windows
Installation for Windows is very simple. You can use the XAMPP installer executable (for example, "xampp-windows-x64-7.4.4-0-VC15-installer.exe"). Detailed installation instructions for Windows are available here.
If you are on Windows XP or 2003 they are not supported by the main package but there are compatible versions of XAMPP for these platforms listed on the download page (but you will only be able to run PHP 5.4 or lower - and therefore will only be able to test Joomla 3.x and lower).
For Windows, it is recommended to install XAMPP in "c:\xampp" (not in "c:\program files"). If you do this, your Joomla! (and any other local web site folders) will go into the folder "c:\xampp\htdocs". (By convention, all web content goes under the "htdocs" folder.)
If you have multiple http servers (like IIS) you can change the xampp listening port. In \apache\conf\httpd.conf, modify the line Listen 80 to Listen [portnumber] (ex: "Listen 8080").
Joomla Community Magazine Tutorial
You can find a detailed tutorial on installing XAMPP on Windows, along with the Joomla 4 Beta, the Joomla Patch Tester and Git in this Joomla Community Magazine article.
Installation on Linux
Install XAMPP
Open Terminal and enter:
sudo tar xvfz xampp-linux-1.7.7.tar.gz -C /opt
(replace xampp-linux-1.7.7.tar.gz with the version of xammp you downloaded). It has been reported that the MYSQL database of xampp 1.7.4 does not work with Joomla 1.5.22
This installs ... Apache2, mysql and php5 as well as an ftp server.
sudo /opt/lampp/lampp start
and
sudo /opt/lampp/lampp stop
starts/stops all the services
Test your XAMPP localhost server
Open your Browser and point it to
http://localhost
The index.php will redirect to
http://localhost/xampp
There you will find instructions on how to change default usernames/passwords. On a PC that does not serve files to the Internet or LAN then changing the defaults is a personal decision.
Get Joomla
Download the latest Joomla instalation zip [1]
Unzip to your hard drive
Connect to localhost with an FTP client Default
    nobody
    lampp
Create a folder for your Joomla on the localhost server
FTP the unpacked Joomla installation files to the newly created Joomla folder.
Important:
- The xammp installation sets the correct Ownership of the files and permissions.
- Using the CHOWN command will cause Ownership problems with xampp.
- Using nautilus to manipulate folders/files on localhost will cause Ownership problems with xampp.
Database info
- Host: localhost
- Default Database name: test
- Default Database user: root
- There is no default Password.
The Administrator password is your choice.
Installing Sample Data is recommended for the novice user.
After installation delete the installation directory and point your Browser to:
http://localhost/yournewjoomlafolder
or
http://localhost/yournewjoomlafolder/administrator
Creating a link in the Ubuntu menu
To create a GUI for xammp connected to your Ubuntu menu
Open up the Terminal and type
sudo gedit /usr/share/applications/xampp-control-panel.desktop
Then copy the following into the gedit and save.
[Desktop Entry]
Encoding=UTF-8
Name=XAMPP Control Panel
Comment=Start and Stop XAMPP
Exec=gksudo "python /opt/lampp/share/xampp-control-panel/xampp-control-panel.py"
Icon=/usr/share/icons/Tango/scalable/devices/network-wired.svg
Terminal=false
Type=Application
Categories=GNOME;Application;Network;
StartupNotify=true
If the control panel fails to launch, try running the Exec command directly in the terminal:
gksudo "python /opt/lampp/share/xampp-control-panel/xampp-control-panel.py"
If you receive the error:
Error importing pygtk2 and pygtk2-libglade
Install the missing libraries:
sudo apt-get install python-glade2
XDebug PHP debugger
The XAMPP package for Linux does not includes the XDebug PHP debugger. To install XDebug on Debian or Ubuntu:
- Install the build-essential package:
    sudo apt-get update
    sudo apt-get install build-essential
    sudo apt-get install autoconf
- Download the development package for your version of XAMPP and extract it over your existing installation:
sudo tar xvfz xampp-linux-devel-1.7.7.tar.gz -C /opt
- Build XDebug:
    wget http://xdebug.org/files/xdebug-2.1.3.tgz
    tar xzf xdebug-2.1.3.tgz
    cd xdebug-2.1.3/
    /opt/lampp/bin/phpize
After this you will have following output on your console…
    Configuring for:
    PHP Api Version:         20090626
    Zend Module Api No:      20090626
    Zend Extension Api No:   20090626

    ./configure --with-php-config=/opt/lampp/bin/php-config
    make
    sudo make install
Then the output will be this.. please monitor the directory specified.
Installing shared extensions: /opt/lampp/lib/php/extensions/no-debug-non-zts-20090626/
Create a folder in your temp folder that will hold the data file generated by XDebug:
    sudo mkdir /opt/lampp/tmp/xdebug
    sudo chmod a+rwx -R /opt/lampp/tmp/xdebug
Alternative installations:
Install using PHP extensions community library (PECL) bundled with xampp:
sudo /opt/lampp/bin/pecl install xdebug
On Ubuntu/Debian you can install using:
apt-get install php5-xdebug
(warning: this will also install Apache and PHP from apt repositories).
Warning for 64bit users
When compiling XDebug or installing via apt-get, you will receive an error when (re)starting xampp:
/opt/lampp/lib/php/extensions/no-debug-non-zts-20090626/xdebug.so: wrong ELF class: ELFCLASS64
This is because xampp runs 32bit but XDebug is 64bit. To overcome this problem, either make xdebug.so on a 32bit machine or download it from:
http://code.activestate.com/komodo/remotedebugging/
Download the file: "PHP Remote Debugging Client" for "Linux (x86)" Extract the content of the file on your computer, this compressed file contains several folders with version numbers ex: 4.4, 5.0, 5.1 ... 5.3 and so forth, get in the folder with the higher version number or the one that works for you, then manually copy the file "xdebug.so" to the following location, overwrite if needed
/opt/lampp/lib/php/extensions/no-debug-non-zts-20090626/
Remember this location could be different on your computer
Installation on Mac OS X
Mac OS X actually includes an Apache server out-of-the-box, but most developers will prefer to use the integrated tools and configurability provided by XAMPP.
As with most programs on Mac, installation is a breeze. Visit Apache Friends - Mac OS X for the universal binary download.
Once the file has finished downloading, just open the disk image, and drag the XAMPP folder to the "Applications" folder alias.
To start the server, open "XAMPP Control.app" and press the start button next to Apache.
A Little Troubleshooting
Many Mac users have a little difficulty at this stage when trying to set
up another instance of Apache on their machine. If you cannot start
XAMPP's Apache, you have two options:
You can change the listening port of XAMPP. In
\Applications\XAMPP\xamppfiles\etc\httpd.conf, modify the line that
says, "Listen 80" to Listen [portNumber]. E.g.:
Listen 8080
You can change the listening port of the pre-installed Apache server. In finder, go to "/etc" (CMD+SHIFT+G); from here you will be able to navigate through the normally hidden Apache files. Find the folder labeled Apache2, and edit the "http.conf" file. Modify the line that says, "Listen 80" to Listen [portNumber]. E.g.:
Listen 8080
Note: If you choose to change the port of the pre-installed Apache server, you may need to restart your computer for changes to take effect. You will also have to authenticate as an administrator to change these files.
Test XAMPP Installation
Once XAMPP is installed and you have started the Apache service with the XAMPP Control Panel tool, you can test it by opening your browser and navigating to "http://localhost". You should see the XAMPP welcome screen similar to the one below.
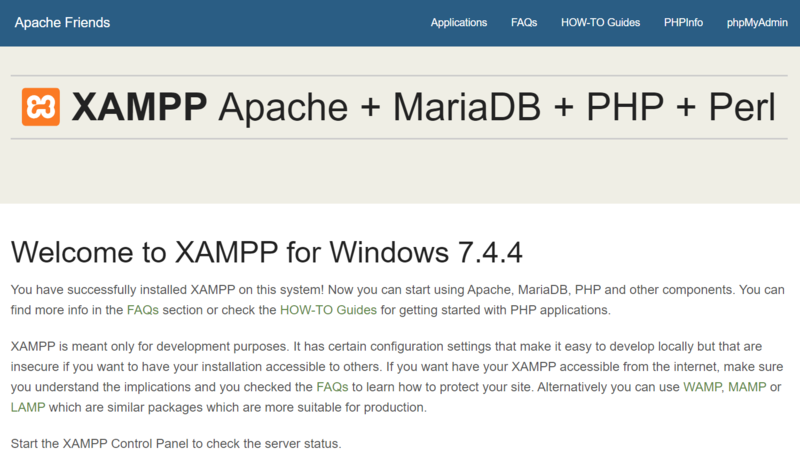
Select the link called "phpinfo()" in the top menu. This will display a long screen of information about the PHP configuration, as shown below.

At this point, XAMPP is installed successfully. Notice the "Loaded Configuration File". We will be editing this file in the next section to configure XDebug.