Joomla Help Screens
Manual Index
Redirects: New or Edit
Description
The Redirects: New or Edit page is used to add a new redirect or edit an existing one. The URL you want to redirect from must not be a working one on your website that actually loads a web page. It can be the URL to a web page that you have disabled in the Joomla! administrator interface. The Source URL you specify when you create the redirect should be the full URL as you would type it in your web browser. The Destination URL you specify when you create a redirect must be the full URL as well.
Common Elements
Some elements of this page are covered in separate Help articles:
How to access
- Select System → Redirects from the Administrator menu. Then...
- To create a new redirect click the New button in the Toolbar. Or...
- To edit an existing redirect click its link in the Expired URL column.
Screenshot
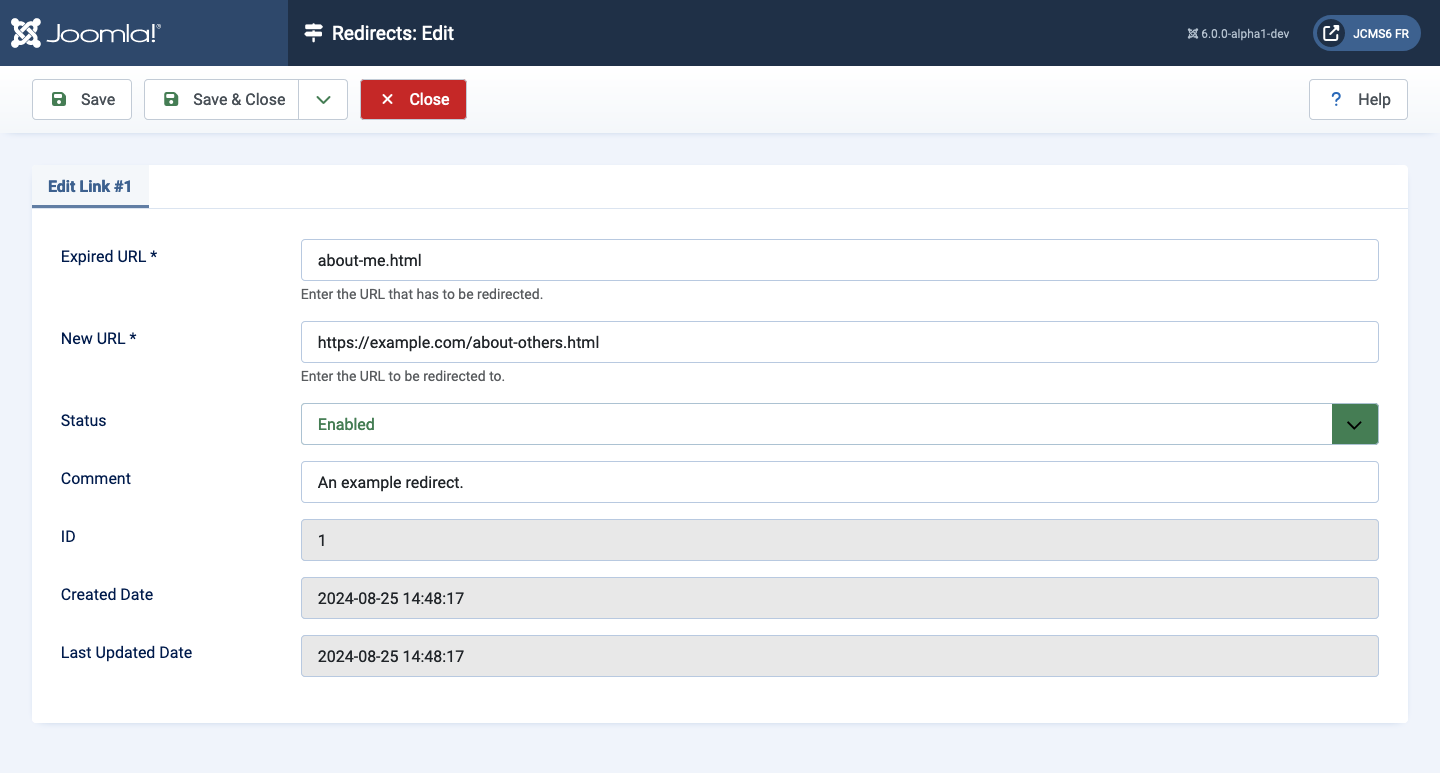
Form Fields
Edit/New Link #1 tab
- Expired URL The URL to be redirected.
- New URL The URL to redirect to.
- Status Published status of the item. Possible values are:
- Enable The item is enabled. This is the only state that will allow regular website users to view this item.
- Disabled The item is disabled.
- Archived The item has been archived.
- Trashed The item has been sent to the Trash.
- Comment A comment that is only viewable by an administrator. It is primarily intended for administrator reference only.
- ID This is a unique identification number for this item assigned automatically by Joomla. It is used to identify the item internally, and you cannot change this number. When creating a new item, this field displays "0" until you save the new entry, at which point a new ID is assigned to it.
- Created Date Date the item (Article, Category, etcetera) was created.
- Last Updated Date Shows the last date the item was modified.
How to Create a Redirect
- First ensure that you have enabled the option Use URL Rewriting in
the Global Configuration options of your Joomla! installation. Note
that just enabling the Use URL Rewriting option is not enough. You
must also take the additional step of renaming the
htaccess.txtfile in the web server directory where you installed Joomla! to.htaccessor to whatever file name your Apache web server requires for additional configuration directives. In the Apache configuration file this setting is namedAccessFileNameand by default this is set to.htaccess. - Next open the Redirect: Links page and select the New toolbar button.
- In the Redirects: New page, enter the redirect information. When entering URLs into the Expired URL and New URL fields, enter the complete URL as you would type it into your web browser to view it. The Expired URL should be a URL that does not resolve to any valid web page on your website. You can specify a source URL for a Joomla! web page that you have put into a disabled state in the administrator backend. Ensure the State option is set to Enabled.
- Select the Save & Close toolbar button to save your new redirect and put it into effect.
Tips
- When entering URLs into the Expired/Source URL and New/Destination URL fields, enter the complete URL as you would type it into your web browser to view the web page.