Joomla Help Screens
Manual Index
Menu Item: Registration Form
Description
The Registration Form menu item type is used to create a User Registration form page. The default form contains basic information: Name, Username, Password, and Email Address.
How To Access
To create a new Registration Form menu item:
- Select Menus → [name of the menu] from the Administrator
menu (for example, Menus → Main Menu). Then...
- Select the New button in the Toolbar. Then...
- Select the Menu Item Type Select button.
- In the modal dialog select the Users item to open a list and then select the Registration Form item.
To edit an existing Registration Form menu item:
- Select its Title in the Menus: Items list.
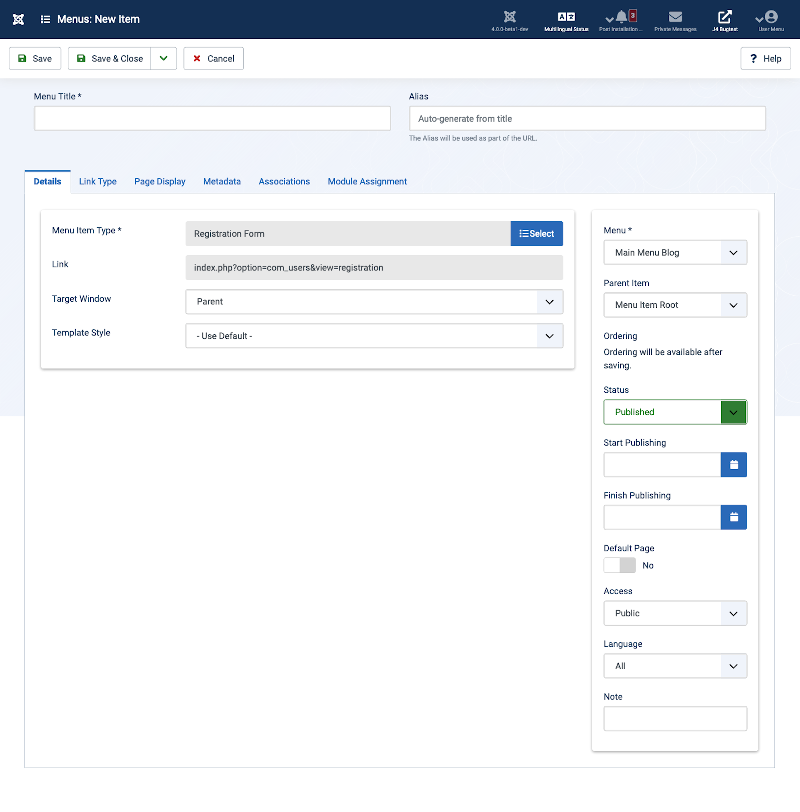
Screenshot
Form Fields
- Menu Title: The title that will display for this menu item.
- Alias. The internal name of the item. Normally, you can leave this blank and Joomla will fill in a default value Title in lower case and with dashes instead of spaces.
Details Tab
Left Panel
- Menu Item Type. The Menu Item Type selected when this menu item was created. This can be one of the core menu item types or a menu item type provided by an installed extension.
- Link. The system-generated link for this menu item. This field cannot be changed and is for information only.
- Target Window. Select from the drop-down list.
- Template Style. Select from the drop-down list.
Right Panel
- Menu. Shows which menu the link will appear in.
- Parent Item. The parent menu item for this menu item. Used to determine whether a Menu Item is a top-level item or a submenu item. Select 'Menu Item Root' (the default value) if this is a top-level Menu Item. Otherwise, select the Menu Item that is this item's parent.
-
Ordering. You can change the order of an item within a list as
follows:
- If the list Filter Options include a Position filter select the desired Position. This will limit the list to items that are assigned to that Position.
- Select the Ordering icon
 in the Table
heading to make it the active ordering item. The ordering icons in
each row will change from light grey to dark grey and the pointer
will change to a drag arrow on hover.
in the Table
heading to make it the active ordering item. The ordering icons in
each row will change from light grey to dark grey and the pointer
will change to a drag arrow on hover. - Select one of the Ordering icons
 and
drag it up or down to change the position of that row in the list.
The items will display in the new order within the Position.
and
drag it up or down to change the position of that row in the list.
The items will display in the new order within the Position.
- Status. The published status of the item.
- Start Publishing. Date and time to start publishing. Use this field if you want to enter content ahead of time and then have it published automatically at a future time.
- Finish Publishing. Date and time to finish publishing. Use this field if you want to have content automatically changed to Unpublished state at a future time (for example, when it is no longer applicable).
-
Default Page. If Yes, this menu item is the default or home page
for the site. There must be exactly one menu item set as the default
page. You can change the default page in two ways:
- Click on the Home column of the desired menu item in the Menus: Items screen.
- Open the menu item for the new default page and change the Default Page setting to Yes.
- Access. The viewing Access Level for this item.
- Language. Item language.
- Note. This is normally for the site administrator's use (for example, to document information about this item) and does not show in the Frontend of the site.
Common Options
See Menus: New Item for help on fields common to all Menu Item types, including:
- Right Panel
- Link Type
- Page Display
- Metadata
- Associations
- Module Assignment
Toolbar
At the top of the page you will see the toolbar shown in the Screenshot above. The functions are:
- Save. Saves the item and stays in the current screen.
- Save & Close. Saves the item and closes the current screen.
- Save & New. Saves the item and keeps the editing screen open and ready to create another item.
- Cancel. Closes the current screen and returns to the previous screen without saving any modifications you may have made. Or
- Close. Closes the current screen and returns to the previous screen without saving any modifications you may have made. This toolbar icon is not shown if you are creating a new item.
- Help. Opens this help screen.
Front End Screenshot
Example Front End Site images are generic images using Joomla! core installation supplied free Front End Templates. The actual view can depend on the installed custom template used and the template's style for those views on a Joomla! website. Default User Registration form:

Quick Tips
- For extended registration, see the User Profile Plugin. It can be used to add required fields for registration and it provides a method to force a TOS(Terms of Service) acceptance for registration.