Joomla Help Screens
Manual Index
Guided Tours: Edit Tour
Description
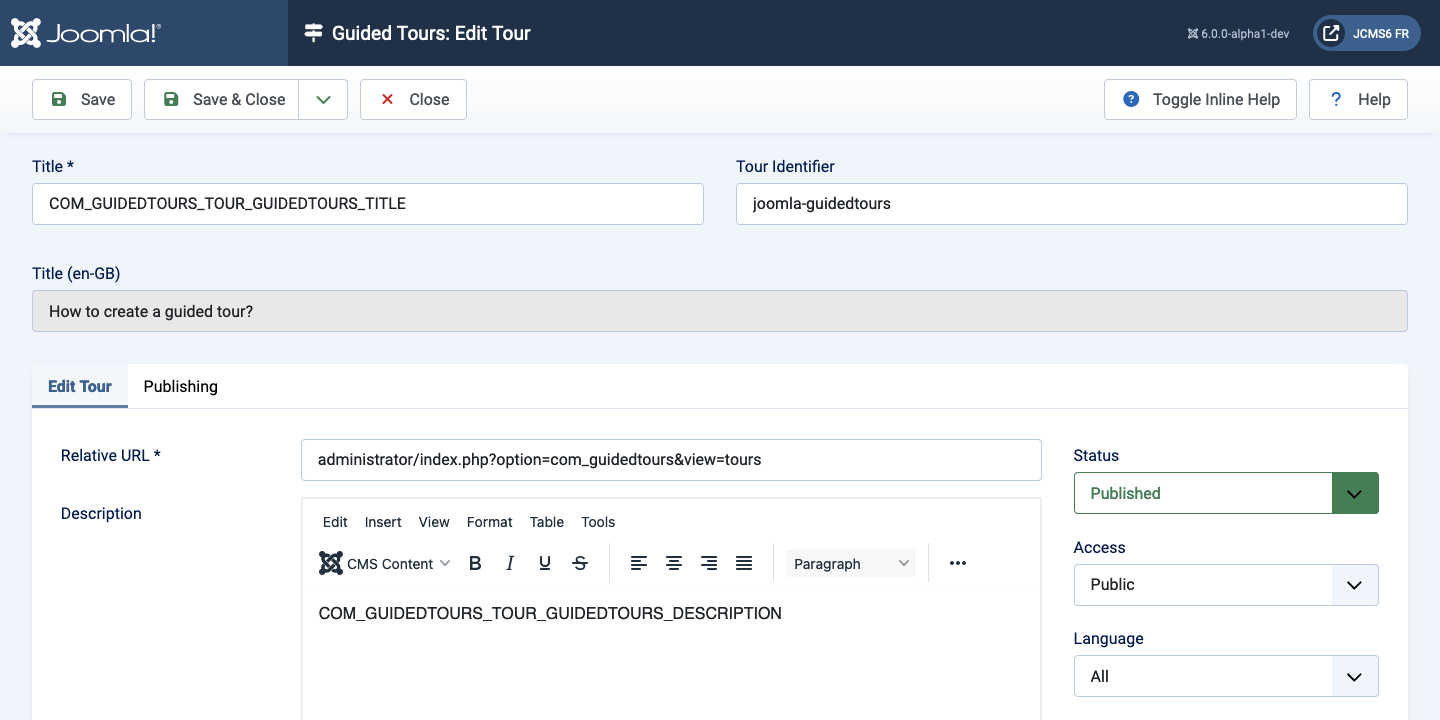
This page is used to add a new Tour or edit an existing Tour. A tour must include at least one step. Once a tour has been newly created, go to the Tours list and select the button with the 0 label from the Steps column. The first step of the tour is automatically made from the tour title and description.
Common Elements
Some aspects of this page are covered in separate Help articles:
How to Access
- Select System -> Manage -> Guided Tours from the Administrator menu.
- Select the New toolbar button to add a tour.
- Select a Title from the list to edit a tour.
Screenshot

Form Fields
- Title The Title for this tour. If the title is a language key, an additional field is shown, representing the translation of that key for the user's locale.
- Tour Identifier A unique identifier for the tour. On Save, or Save as Copy, a value is provided by default. A suggested format would be authorname-tourname, companyname-tourname or domain-tourname. This identifier has multiple purposes: start a tour from anywhere (not only from the Guided Tours module), differentiate tours coming from different origins, and on multilingual sites, it dictates the language file names structure.
Edit Tour tab
Left Panel
- Relative URL The mandatory relative path from where the tour starts.
For instance, to start a tour from the tour's page, enter
administrator/index.php?option=com_guidedtours&view=tours. - Description This is where you enter the description of the tour. The tour description can be a language key. When this is the case, a secondary field presents the translated description of that key for the user's locale.
Right Panel
- Component Selector The tour will be visible in priority in pages of the selected extensions. Use All to show the tour in all pages. When set to All, the tour is placed last in the list of contextual tours in the module dropdown. This is a mandatory field.
- Auto Start Allows the tour to start automatically when a user reaches the context in which the tour should be displayed.
Tips
- There are 2 methods to insert an image into the tour's description using the
TinyMCE editor.
- The CMS Content dropdown list provides access to the Media screen that lets you browse image files and upload images.
- The Insert dropdown list is a simple form for which you need to know the image url. It is used for external images.
- There are 2 ways tours can be created for multilingual environments:
- Create one tour for each supported language.
- Create one tour only for all languages and use language keys for title and description.
- Use GUIDEDTOUR in language keys as a convention wherever language keys are used (for title and description).