Joomla Help Screens
Manual Index
Contacts: Options
Description
Contact Options used globally for all contacts.
Common Elements
Some aspects of this page are covered in separate Help articles:
How to Access
- Select Components → Contacts from the Administrator menu.
- Select the Options button in the Toolbar. The Options button is available on the Contacts and Contacts: Categories pages.
Screenshot
Form Fields
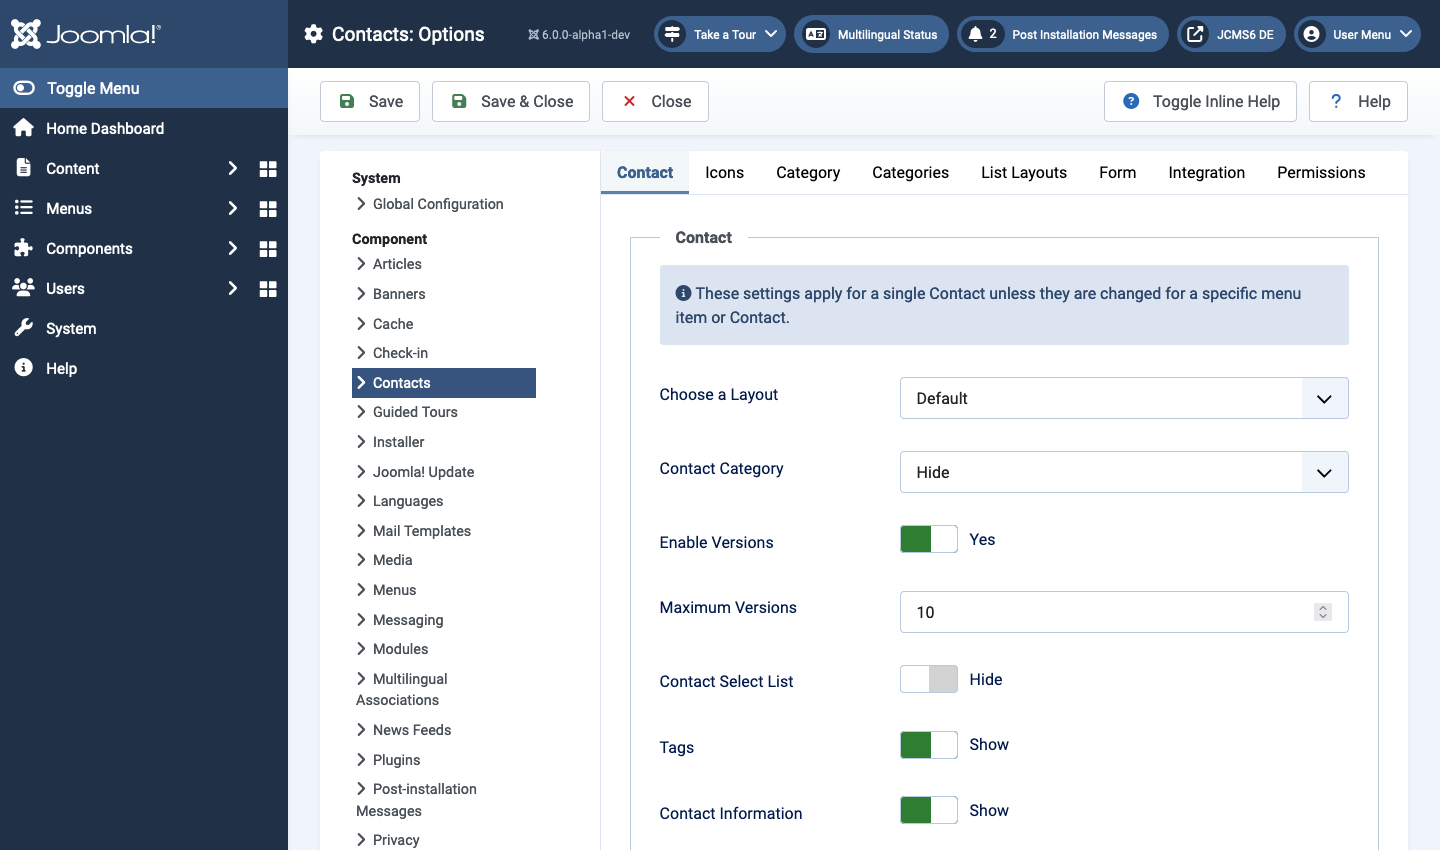
Contacts Tab
These settings apply for single Contact unless they are changed for a specific menu item or Contact
- Choose a Layout Default layout to use for items.
- Contact Category If Hide, the Contact Category will not show. If Show Without Link, Category will show as text. If Show With Link, Category will show as a link to a Single Category Menu Item.
- Enable Versions Whether or not to save version history for this component. If No, version history will not be saved for component items or for this component's categories.
- Maximum Versions The maximum number of versions to store for an item. If an item is saved and the maximum number of versions has been reached, the oldest version will be deleted automatically. If set to 0, then versions will never be deleted automatically. Also, specific versions may be flagged as Keep Forever and will not be deleted automatically. Note that versions may be deleted manually using the Delete button in the Version History screen.
- Show Contact List If Show, the user will be able to change which contact is shown by selecting a contact from a drop-down list of all contacts in the current contact category.
- Display Format Determines the style used to display sections of the contact form.
- Tags Whether to hide or show any tags for this item.
- Use Global Use the default value from the contacts options screen.
- Show Show to allow users to select a contact in a drop down list.
- Hide Do not display the Contact list.
- Contact Information Show or hide the contact information.
- Name Show name of the contact.
- Contact's Position Show or hide position.
- Email Show or hide contact email.
- Add Mailto: Link Adds a mailto: link to the displayed email address.
- Street Address Show or hide street address.
- City or Suburb Show or hide city or suburb.
- State or County Show or hide state or county.
- Postal/ZIP Code Show or hide postal or zip code.
- Country Show or hide Country.
- Telephone Show or hide telephone number.
- Mobile Phone Show or hide mobile number.
- Fax Show or hide fax number.
- Webpage Show or hide webpage.
- Image Show or hide image.
- Image Choose the image file to use for the contact.
- Miscellaneous Information Show or hide miscellaneous information.
- vCard Whether or not to allow export to vCard format.
- Show User Articles Show User Articles::If this contact is mapped to a user, and if this is set to Show, then a list of articles created by this user will show.
- # Articles to List Number of articles to list.
- User Profile Show or hide Profile.
- Show User Custom Fields Show user custom fields which belong to all or only selected field groups.
- Contact Links Show or hide Links.
- Link A Label An additional link for this contact.
- Link B Label An additional link for this contact.
- Link C Label An additional link for this contact.
- Link D Label An additional link for this contact.
- Link E Label An additional link for this contact.
Icons Tab
![]()
These settings apply for single Contact unless they are changed for a specific menu item or Contact
- Settings Choose whether to display icons, text or nothing next to the information.
- Address Icon Select the Address icon. If none selected, the default icon will be displayed.
- Email Icon Select the Email icon. If none selected, the default icon will be displayed.
- Telephone Icon Select the Telephone icon. If none selected, the default icon will be displayed.
- Mobile Icon Select the Mobile icon. If none selected, the default icon will be displayed.
- Fax Icon Select the Fax icon. If none selected, the default icon will be displayed.
- Misc Icon Select the Misc icon. If none selected, the default icon will be displayed.
Category Tab
Category Options control how contacts will show when you drill down to a Category to view its contacts.
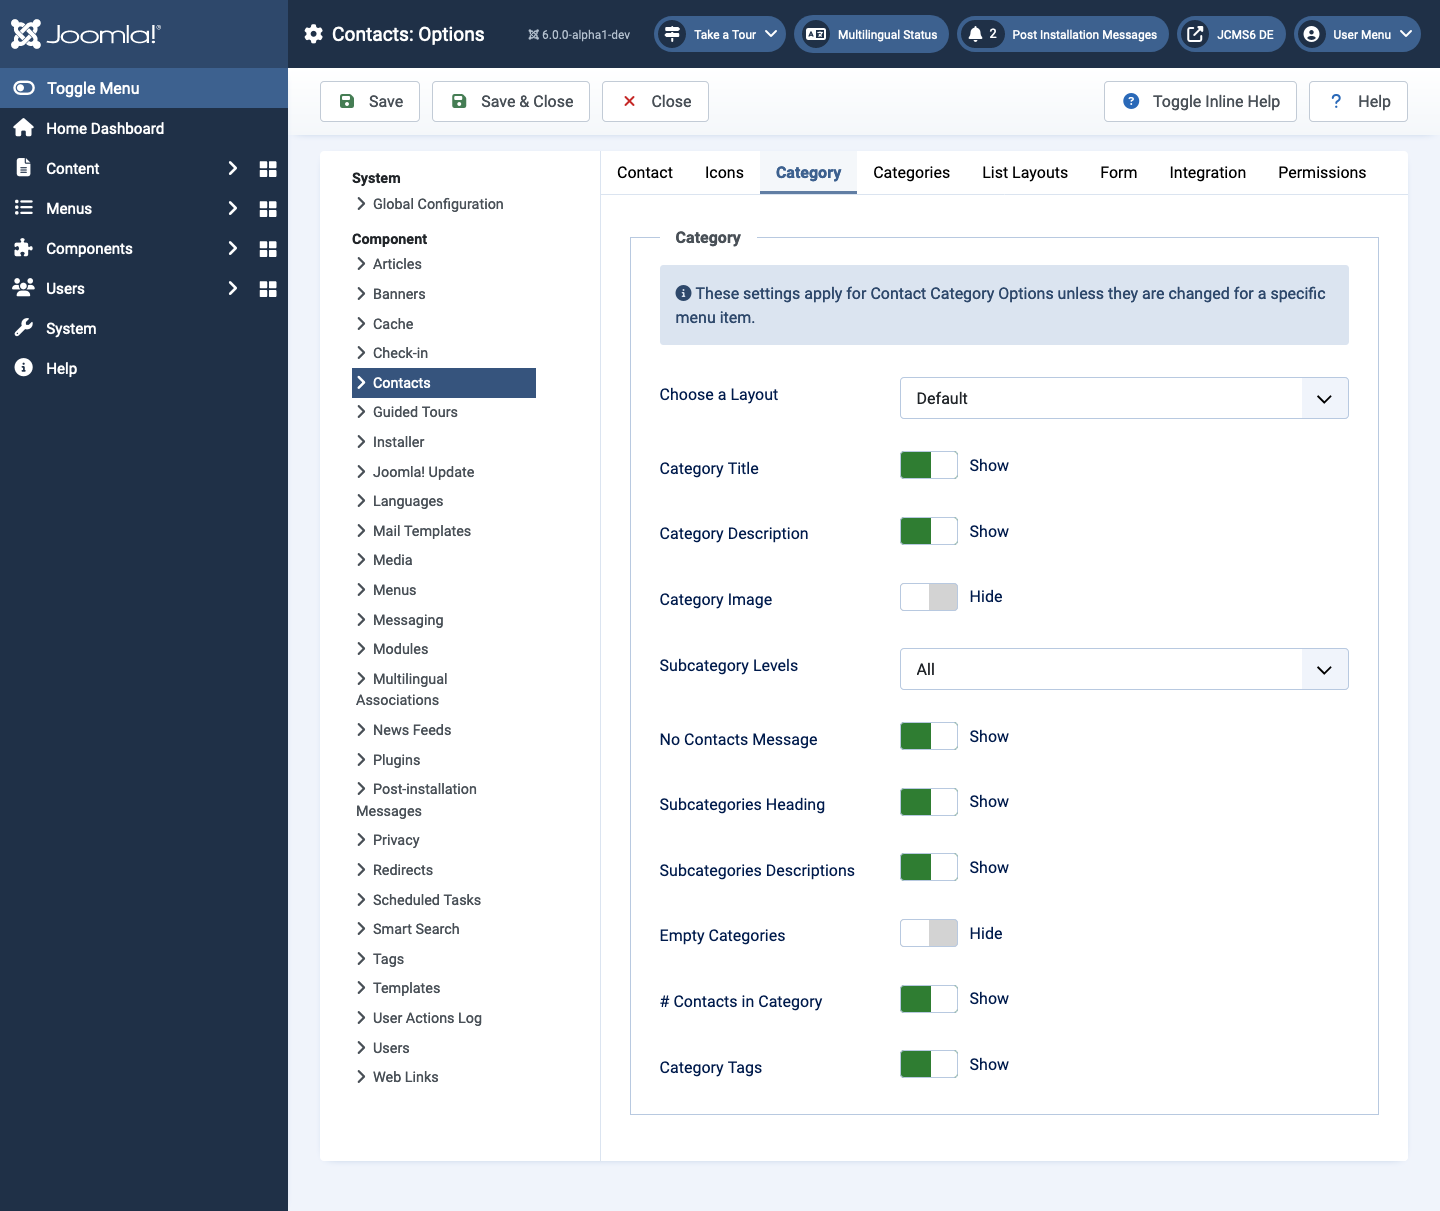
- Choose a Layout (Blog/List/user defined). This lets you select the default layout to show when you click on a Category link. If you create an alternative layout for a category layout, you may select that as the default.
- Category Title Show or hide the title of the category.
- Category Description Show or hide the category description.
- Category Image Show or hide the category image.
- Subcategory Levels (None/All/1-5). Categories in Joomla can be created in a hierarchy. This lets you control how many levels of subcategories to show when showing a category view.
- Subcategories Descriptions Show or hide the descriptions for displayed subcategories.
- Empty Categories Show or hide categories that don't contain any articles or subcategories.
- # Contacts in Category Show or hide the number of Contacts in category.
- Category Tags Show or hide the tags for a single category.
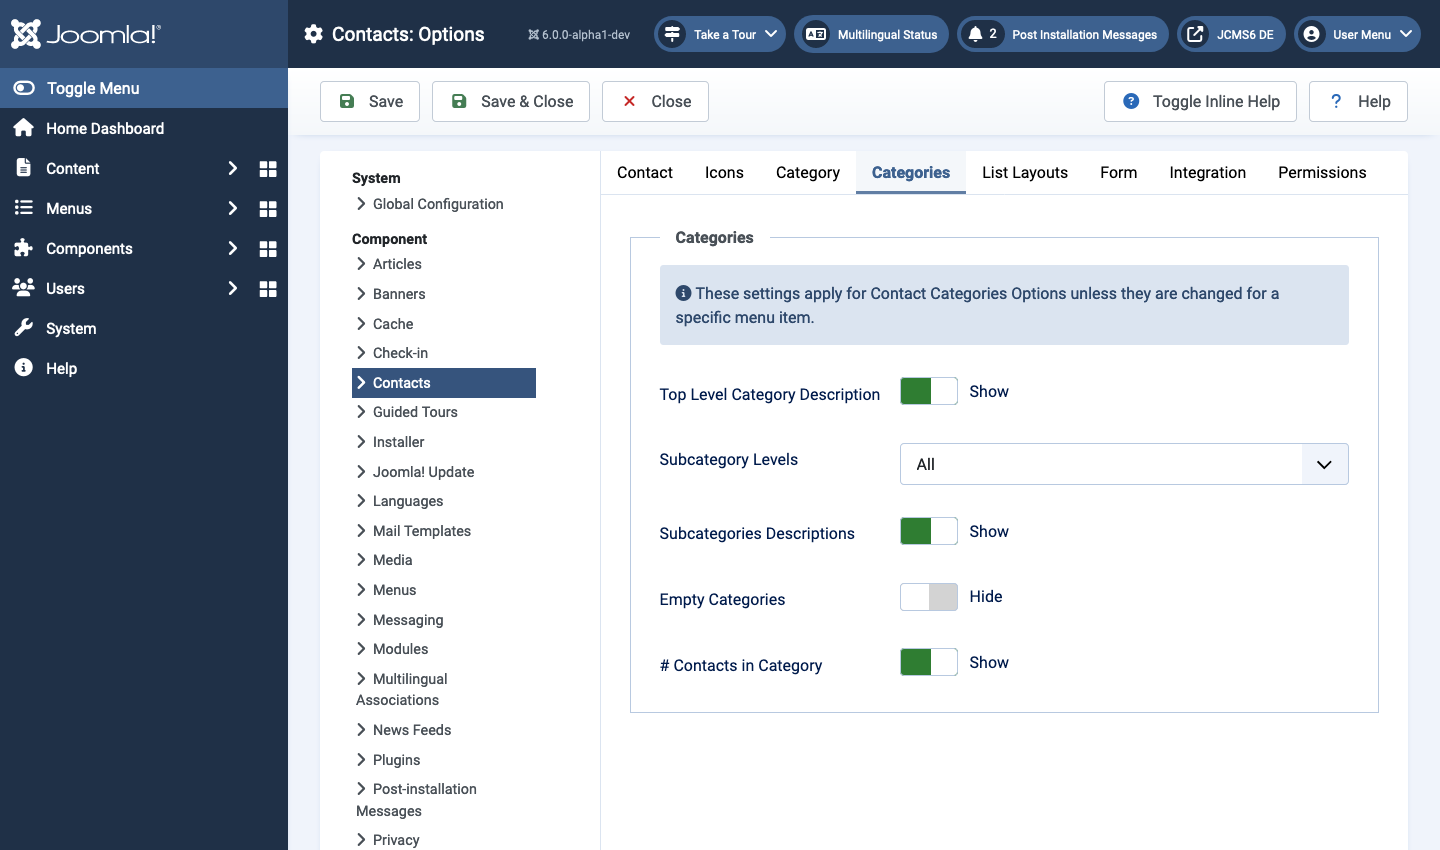
Categories Tab
These settings apply for Contact Categories Options unless they are changed for a specific menu item.
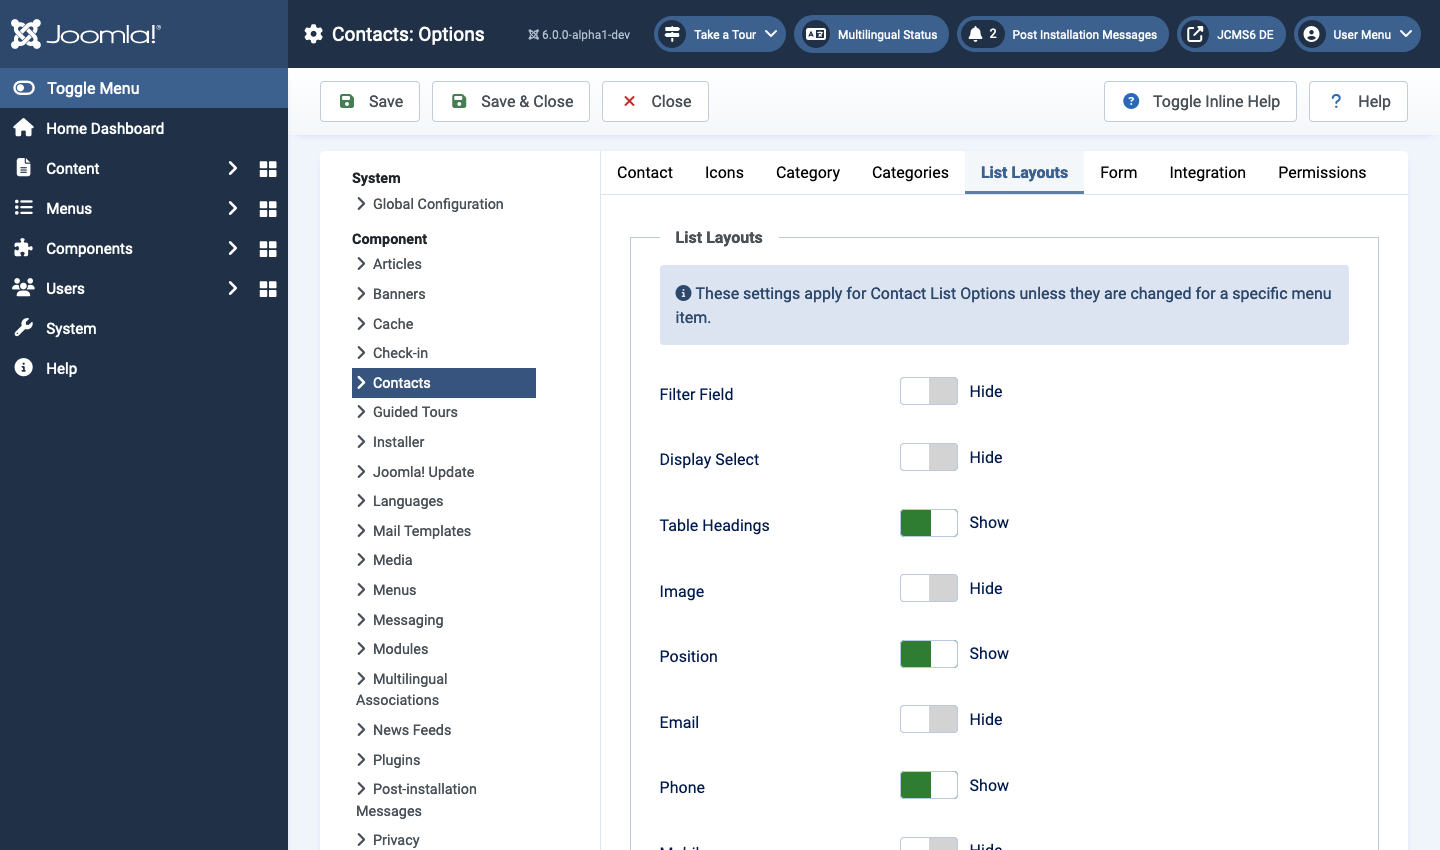
List Layouts Tab
These settings apply for Contact List Options unless they are changed for a specific menu item.
- Filter Field The Filter Field creates a text field where a user
can enter a field to be used to filter the articles shown in the list.
The possible options for this (in the back-end menu item edit) are shown
below.
- Hide Don't show a filter field.
- Title Filter on article title.
- Author Filter on the author's name.
- Hits Filter on the number of article hits.
- Display Select Show or hide the Display # control that allows the user to select the number of items to show in the list. An example is shown below. If there are more items than this number, you can use the page navigation buttons (Start, Prev, Next, End, and page numbers) to navigate between pages. Note that if you have a large number of items, it may be helpful to use the Filter options, located above the column headings, to limit which items display.
- Table Headings Show or hide table Headings above the article list.
- Image Show or hide an Image column in the list of Contacts.
- Position Show or hide a Position column in the list of Contacts.
- Email Show or hide an Email column in the list of Contacts.
- Phone Show or hide a Phone column in the list of Contacts.
- Mobile Show or hide show a Mobile column in the list of Contacts.
- Fax Show or hide a Fax column in the list of Contacts.
- City or Suburb Show or hide a City or Suburb column in the list of Contacts.
- State or County Show or hide a State or County column in the list of Contacts.
- Country Show or hide a Country column in the list of Contacts.
- Pagination Hide or Show Pagination support. Pagination provides
page links at the bottom of the page that allow the User to navigate
to additional pages. These are needed if the listed items will not fit
on one page. The following options are available.
- Use Global Use the default value from the component options screen.
- Auto Pagination links shown if needed.
- Show Pagination links shown if needed.
- Hide Pagination links not shown. Note: In this case, Users will not be able to navigate to additional pages.
- Pagination Results Hide or Show the current page number and total pages (e.g., Page 1 of 2) at the bottom of each page. Use Global will use the default value from the component options.
- Sort by Choose the sort field name.
Form Tab
These settings apply for single Contact unless they are changed for a specific menu item or Contact.
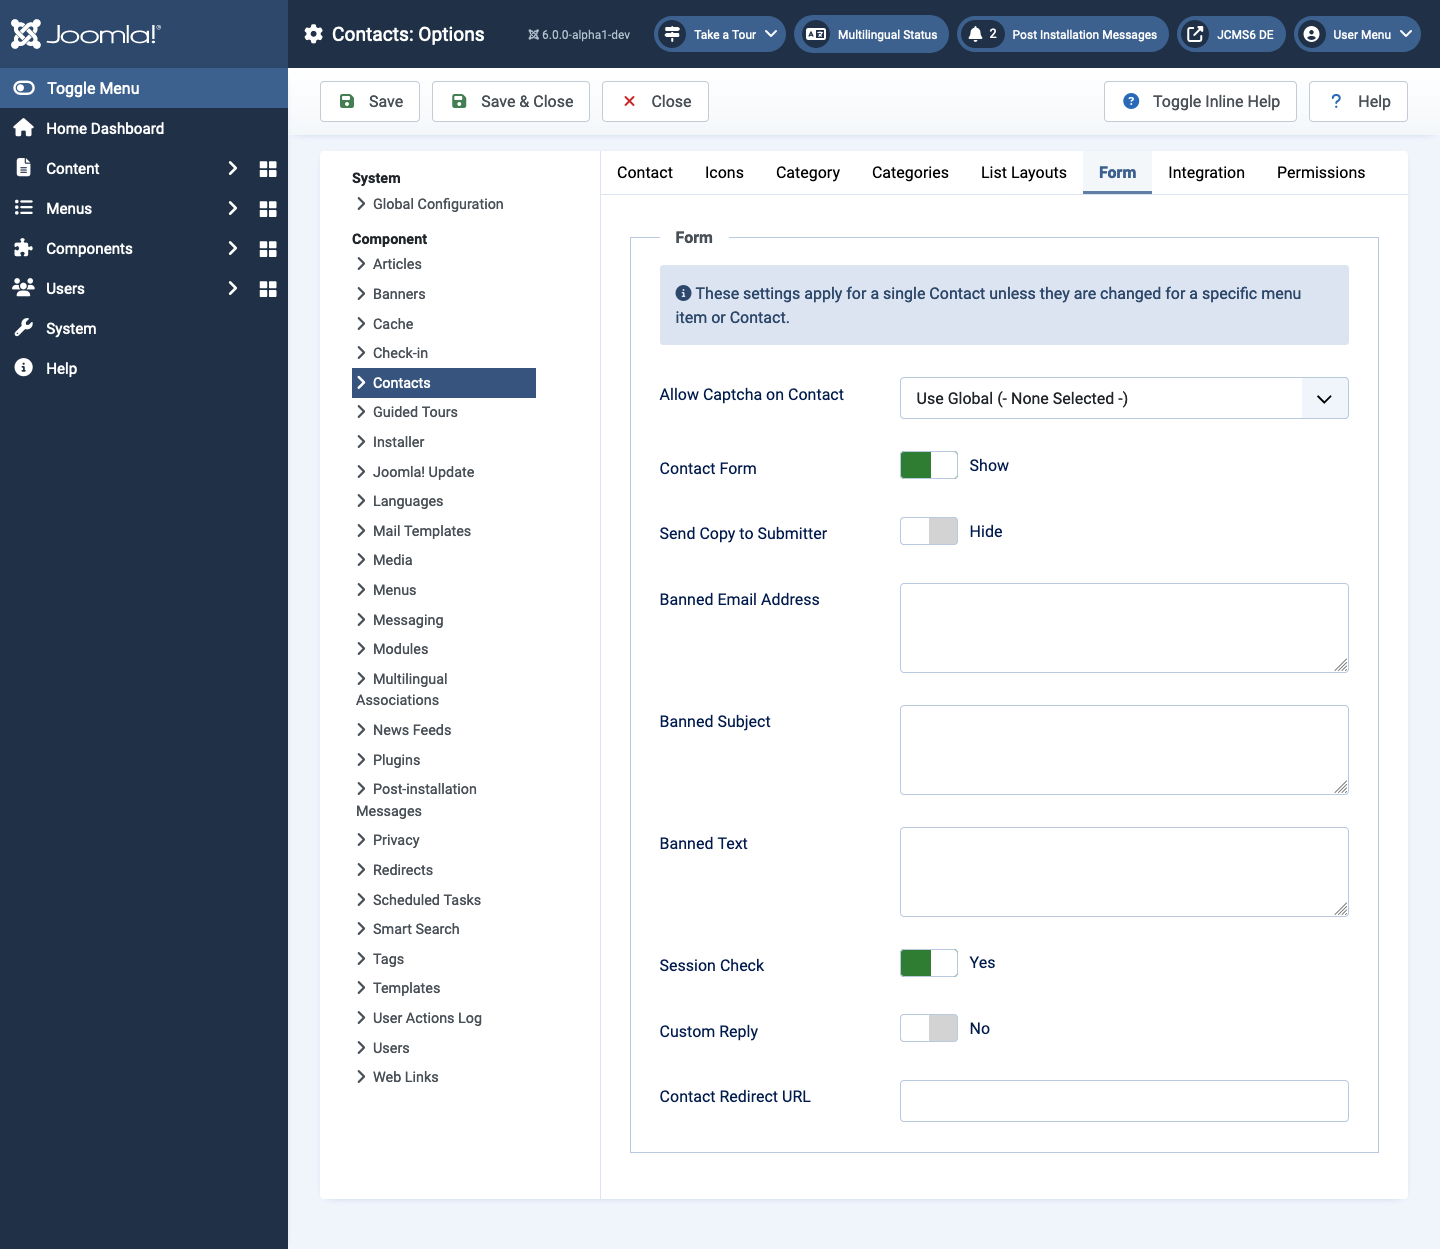
- Allow Captcha on Contact Use Default or None Selected. Select the captcha plugin that will be used in the contact form. Captcha is the name of a technique to prevent spam user registrations by requiring a user to type in characters from a distorted image or to mark I am not a robot. You may need to enter further information for your Captcha plugin in the Plugin Manager.
- Contact Form Show or hide contact form.
- Send Copy to Submitter Hide or Show checkbox to allow copy of email to be sent to submitter.
- Banned Email Email addresses not allowed to submit information with the contact form.
- Banned Subject Subjects not allowed in contact form.
- Banned Text Text not allowed in contact form body.
- Session Check Check for the existence of session cookie. This means that users without cookies enabled will not be able to send emails.
- Custom Reply Turns off the automated reply, allowing for Plugins to handle integration with other systems.
- Contact Redirect Enter an alternative URL, where the user will be redirected after mail is send.
Tips
- If you are a beginning user, you can just keep the default values here until you learn more about using global options.
- If you are an advanced user, you can save time by creating good default values here. When you set up menu items and create contacts, you will be able to accept the default values for most options.
- All values set here can be overridden at the menu item, category, or contact level.