Joomla! Help Screens
Banners: Edit
Description
Used to add or edit banners which can be displayed on your Joomla! website. Remember to create at least one Banner Client and one Banner Category before creating any Banners.
Common Elements
Some aspects of this page are covered in separate Help articles:
How to Access
From the Administrator menu:
- Select Components → Banners to go to the Banners list page.
- Select the New button in the Toolbar to create a new Banner.
- Select a Banner name from the Name column to edit an existing Banner.
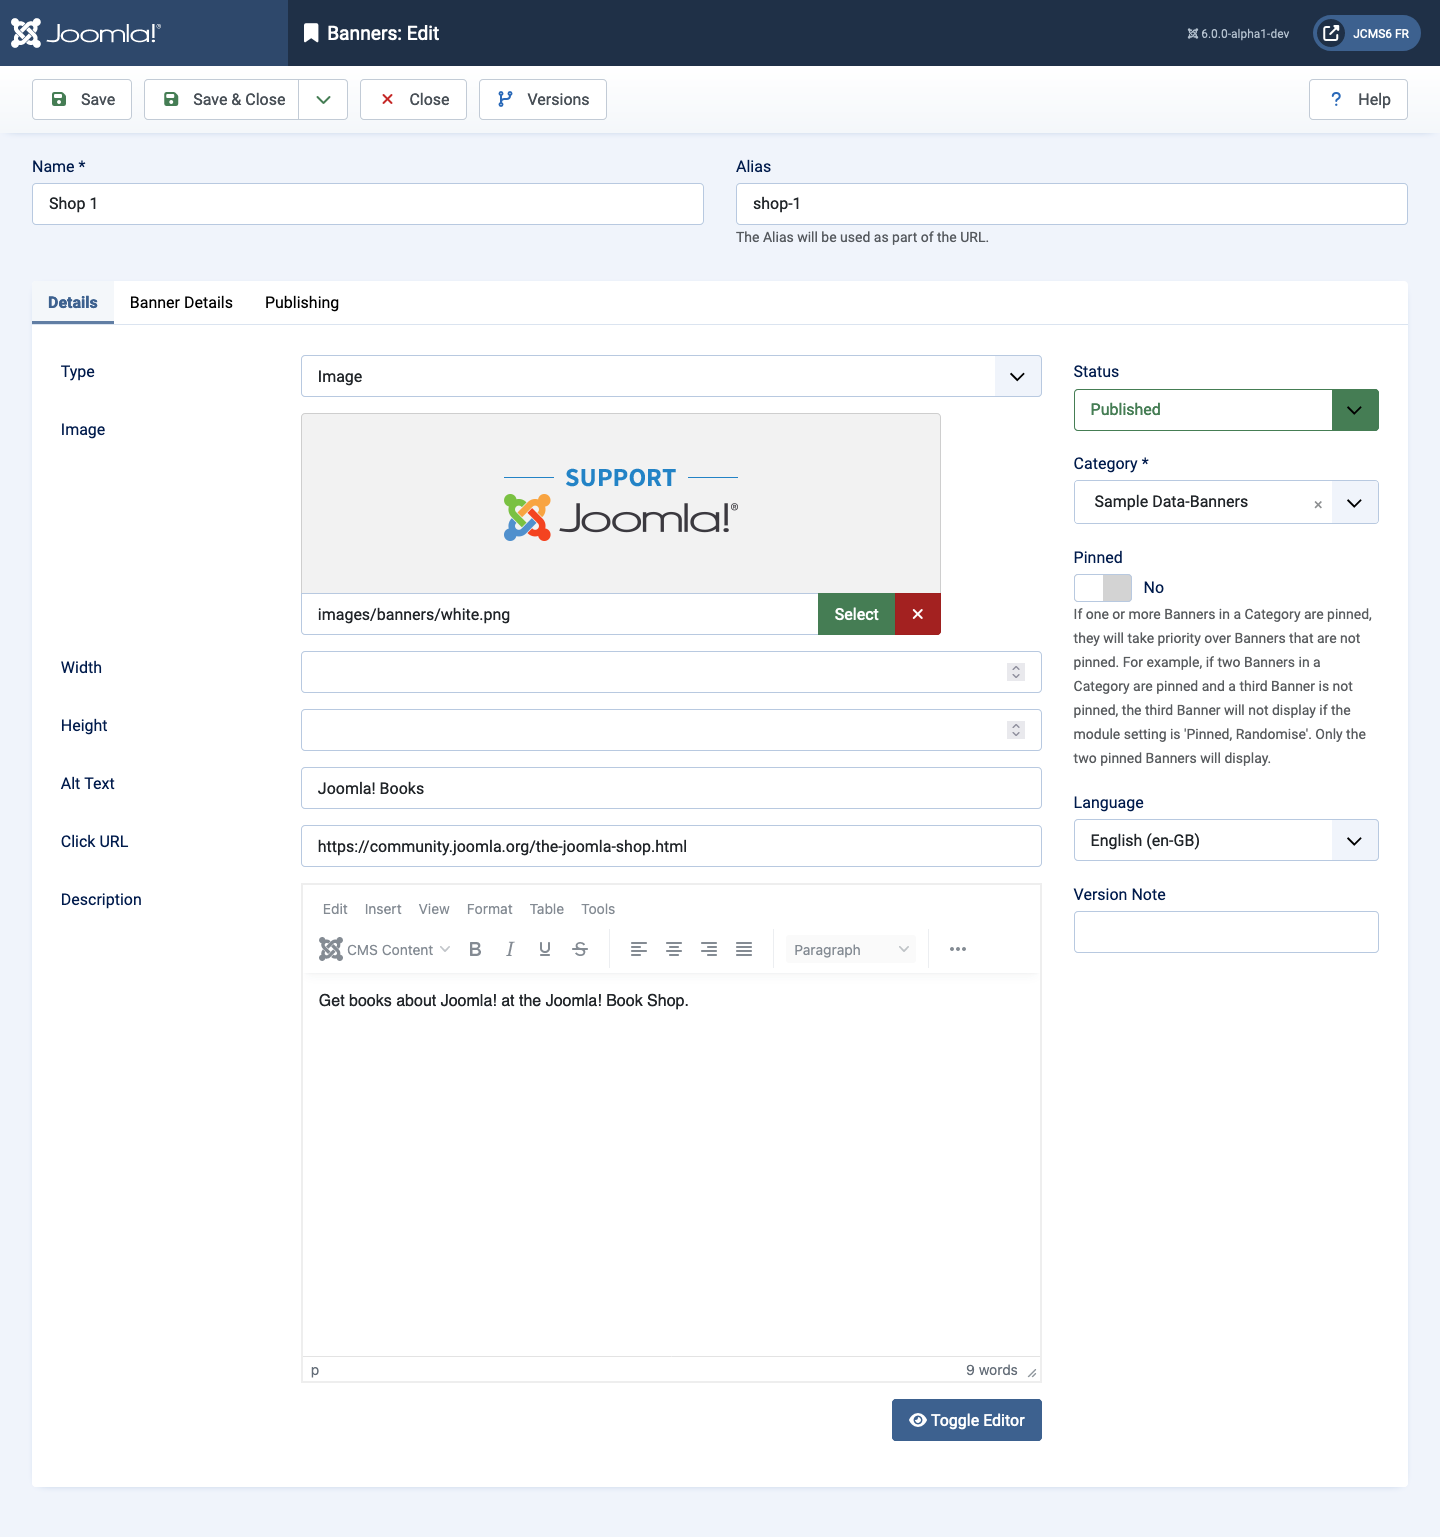
Screenshot
A banner may be a clickable image or some custom code. The Image Type is shown in the screenshot below. The custom type has the image selection box replaced with a code text area.
Form Fields
- Name The name of the Banner. This is the name that will display in the Name column of the Banners list.
- Alias The internal name of the item. Normally, you can leave this blank and Joomla will fill in a default value derived from the Name but in lower case and with dashes instead of spaces.
Details Tab
Left Panel
- Type The type of banner to display. Options are an image file or
custom HTML code.
- Image Image file to display for the banner. Click the Select
button to browse and select the image file to use. Use the Media
page to upload Banner image files to the your site. Images for Banners
have to be in the /images/banners/ directory.
- Width The fixed width to resize the banner image to. Leave this blank if you want to use the actual width of the banner image file.
- Height The fixed height to resize the banner image to. Leave this blank if you want to use the actual height of the banner image file.
- Alternative Text Text to display in place of the banner image in the event the image cannot be displayed.
- Alternative Text Alternative text for the Banner's image.
- Custom Select Custom if you want to enter a custom code for
your banner.
- Custom Code Use {CLICKURL} and {NAME} to merge 'Click URL'
and 'Name' values respectively into your custom code. For example:
<a href="{CLICKURL}"><img src="enter url to image" alt="{NAME}" title="{NAME}"></a>. Another option is to enter an HTML custom code. For example:
<div class="yourclass"><a href="https://yourdomain.com"><img src="pathofyourimage"></a></div>
- Custom Code Use {CLICKURL} and {NAME} to merge 'Click URL'
and 'Name' values respectively into your custom code. For example:
- Image Image file to display for the banner. Click the Select
button to browse and select the image file to use. Use the Media
page to upload Banner image files to the your site. Images for Banners
have to be in the /images/banners/ directory.
- Click URL The URL to navigate to when the User clicks on the Banner.
- Description Enter a description for the Banner.
Right Panel
- Status The published status of the item.
- Pinned Whether or not the Banner is pinned. If
one or more Banners in a Category are designated sticky, they will
take priority over Banners that are not sticky.
- For example, if two Banners in a Category are pinned and a third Banner is not pinned, the third Banner will not display if the Banner display module setting is Pinned, Randomise or Pinned, Ordering. Only the two pinned Banners will display. If the pinned banners have a fixed number of impressions, once those impressions are used up, the pinned banners will no longer display, and the non-pinned banners will begin displaying automatically.
- Language Item language.
- Version Note Optional field to identify this version of the item in the item's Version History window.
Banner Details tab
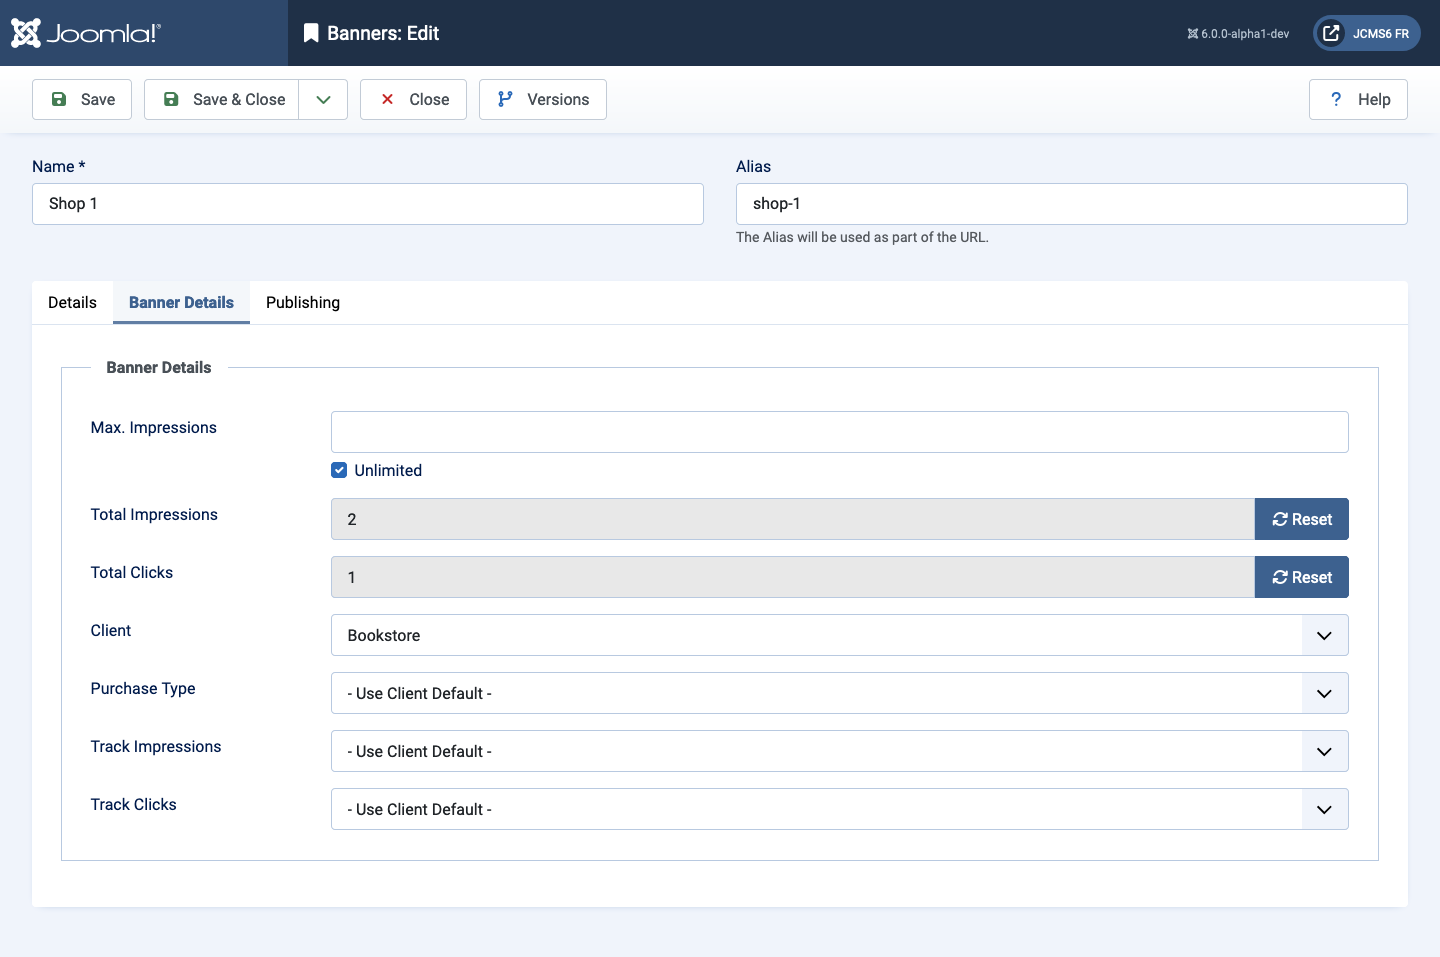
- Max. Impressions The number of Impressions purchased for this Banner. Impressions are the number of times a Banner will be displayed on a page. Check the 'Unlimited' checkbox if an unlimited number of Impressions is allowed.
- Total Impressions The number of times this Banner has been displayed on a web page to a user. No entry is allowed. You can reset this number to 0 by pressing the 'Reset impressions' button.
- Total Clicks The number of times this Banner has been clicked. No entry is allowed. You can reset this number to 0 by pressing the Reset clicks button.
- Client The Client for this Banner. Select one from the drop-down list box of existing Clients.
- Purchase Type: The purchase type of the banner. This is used to indicate how the banner client purchased the display time for the banner.
- Track Impressions Whether or not to track the number of times the banner is displayed to web site visitors.
- Track Clicks Whether or not to track the number of times the banner is clicked by web site visitors.
Tips
-
Banners are placed on specific pages by adding Modules of type Banners using the Modules list.
-
If you have a series of Banners that you would like to display on one or more pages in random order:
- Create the Banners you wish to include, making sure they have the same Client and Category.
- Create a Banner Module for this Client and Category, and in the Menu Assignment pick the Menu Selections for the module to display on.
- In the Banner Module, set the Randomise value to Sticky, Randomise.
With these settings, the different Banners for that Client and Category will display on the selected pages in random order.